
For Atari 800XL, 800XLF, 65XE and 600XL 64kb home computers.
Diagnostic program – previews
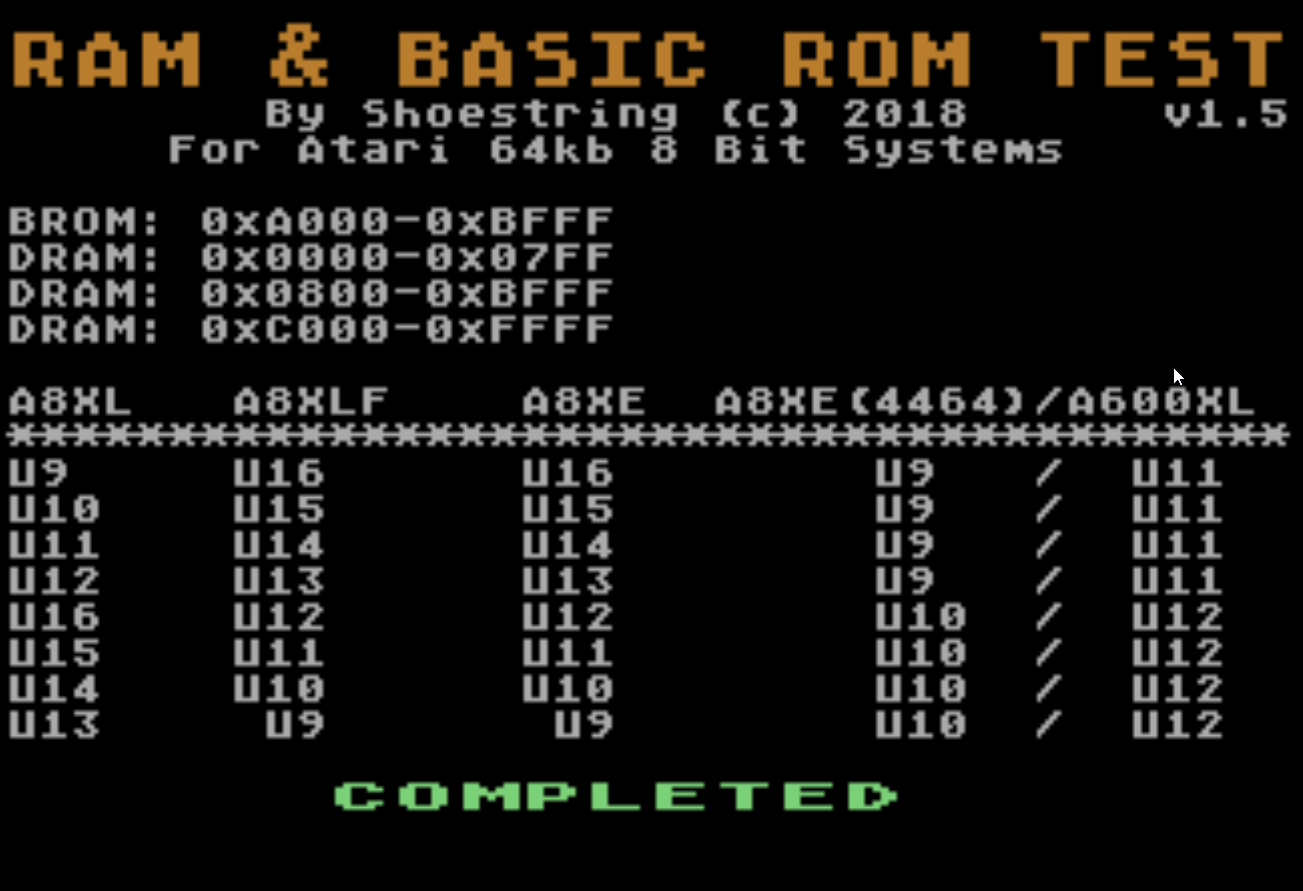
This program installs in the OS ROM socket and is used as a means for testing the DRAM and the Atari Basic ROM. If you have some spare 27c128s lying around then this can easily be installed without an adapter in any Atari 8 bit.
When the program first fires up you’ll see a black screen & hear an annoying sound as the data is being written to the first 2kb of DRAM, this is intentional and to let you know that the program is busy writing data and evaluating it. The first chunk of memory is critical to test as this contains page zero and work ram used for assembler programs accessing shadow registers..etc
- Evaluates the first 2kb 0x0000 – 0x07ff.
- Calculates a checksum of the BASIC ROM and stores the result in zero page if the memory there is good.
- Turns off BASIC.
- Performs evaluation from 0x800-0xbfff ( this includes the memory under the BASIC ).
- Copies a large chunk of the ROM to DRAM starting at offset 0x900.
- Turns off OS rom.
- Tests the remainder of the memory 0xc000 – 0xffff, including the memory underneath the OS ROM but skipping the I/O area ( 0xd000-0xd7ff )
Memory test algorithms used
- Checkerboard, Inverse checkerboard, Walking 1s, Walking 0s, 1s, 0s and exhaustive.
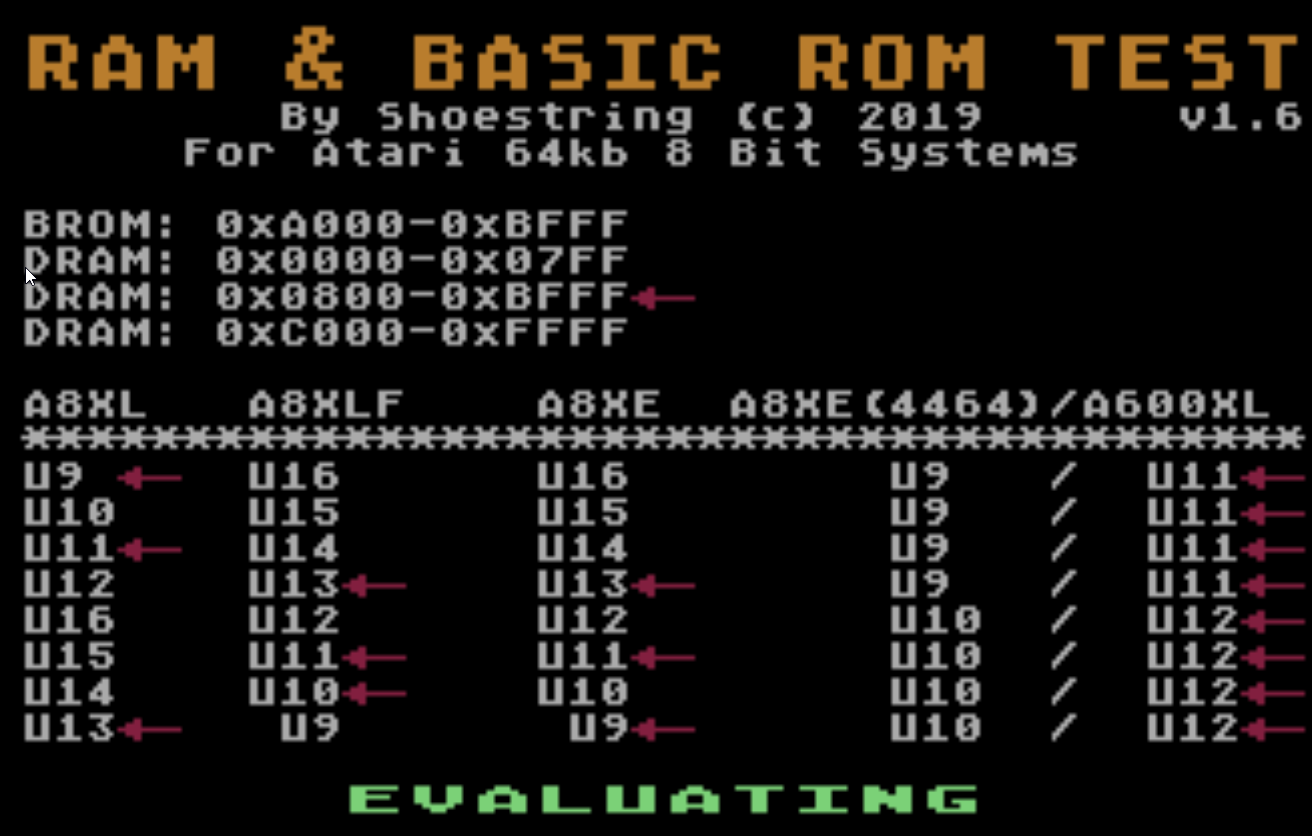
Example of walking 1 bit pattern evaluation
This writes the bit pattern directly to PMG address space which is visible on the right hand side of the screen in red.
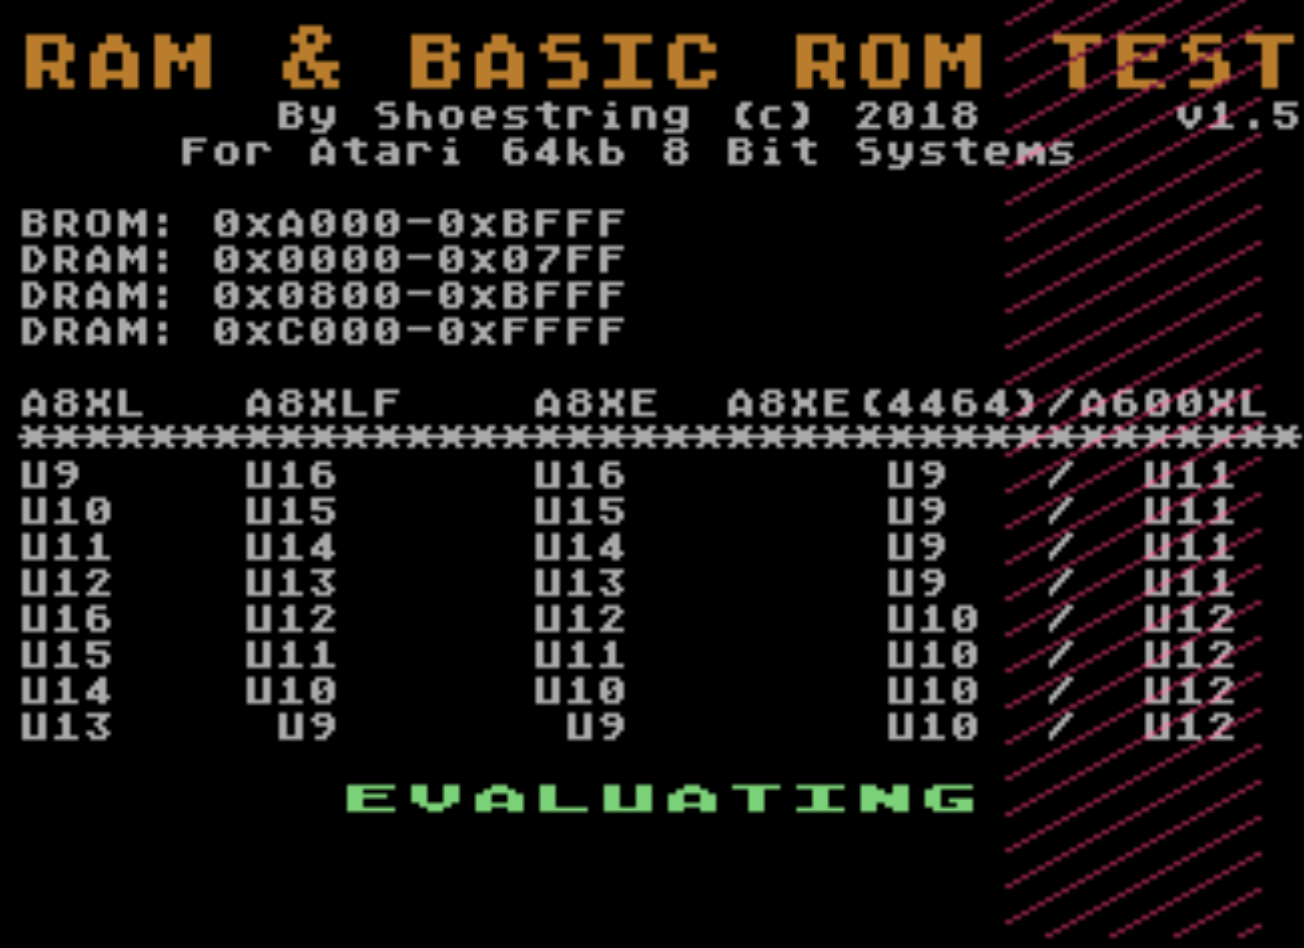
Bad ram detected in the 0x800 to 0xBffff memory region ( the arrow indicates a bad data bit was read back )
What it does
- During testing, the program displays bit patterns on screen which represent the data written to DRAM.
- Plays sound to indicate CPU is functioning ( for systems playing blind ).
- High beep = cleared one of the available algorithmic tests.
- Low beep = successfully evaluated 100 memory locations with no errors during the exhaustive search.
Note: This does note evaluate the memory underneath the I/O ( 0xd000 – 0xd7ff ). As there is no possible way ( that I know of ) to access it like you can in the Commodore 64 via bank-switching. Programs do not utilise this area of memory anyway.
Pre calculated Basic ROM checksums 16 bit [ sum of bytes ]
- REV A – 0x12c9
- REV B – 0x4469
- REV C – 0x42ab
Advantages of using the ROM
- It will still boot up with no DRAM installed or with dead DRAM, as long as that is the only problem.
- Great for testing completely dead systems with a black screen. If the system does not start then there are other hidden issues. If your system starts up fine with this ROM and there are no DRAM errors, suspect a bad OS ROM ( this would normally cause a red screen ).
Note – Chips that get hot to the touch including DRAM chips indicate an internal short. This should be addressed prior to using this diagnostic tool. +5 voltages below 4.75v will cause instability and unpredictable results. First remove the suspected chip from the machine then power the machine on and confirm no other chips are getting hot to the touch before installing the replacement chip, this is to prevent the possibility of damaging the replacement chip, confirm no short present by checking the +5v reading at one of the chips.
Do not use this diagnostic tool if you have not verified the operation of the power supply.
Limitations
- PMG graphics are written to memory, so if bad ram is detected within these areas then expect unreliable results the wrong data bit being identified. By all means, any error detected should not indicate a false positive and you should manually test each DRAM chip externally using a RAM tester or device programmer that can handle these types of devices. I am currently further testing and investigating more reliable solutions.
To Do – In future version.
- Wre-write the code regarding the reporting side of things and not totally rely on PMGs to indicate bad data bits. This will make reporting more accurate.
- Write a 128kb version for 130XE machines.
What I probably won’t do
- Write a version for systems with memory exceeding 128kb. The diagnostic was written as a means for trouble shooting a basic system.
Download
Download link 1: a8diag1-6.rom
Download link 2: a8diag1-6.rom
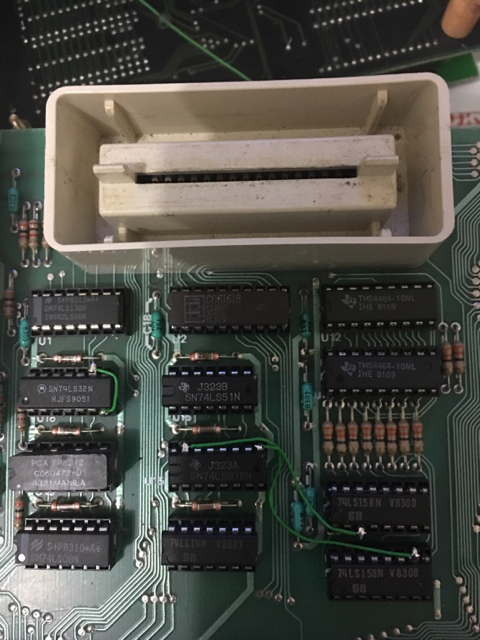
DRAM configuration of 600xl
This tool is compatible with the following DRAM configuration in the 600XL which requires two 4464s installed in the original sockets with 3 additional wires. See following link for instructions. If you use a 3rd party RAM expansion board, then chances are it will have 8 x 4164 1 bit DRAMs. Whilst you can certainly check the integrity of the RAM on the board using this program, you’ll most likely need to identify the bad chips yourself.
This is the cleanest method in my opinion as it does not require soldering any wires to the board and is easily reversible.
Sorry, the comment form is closed at this time.