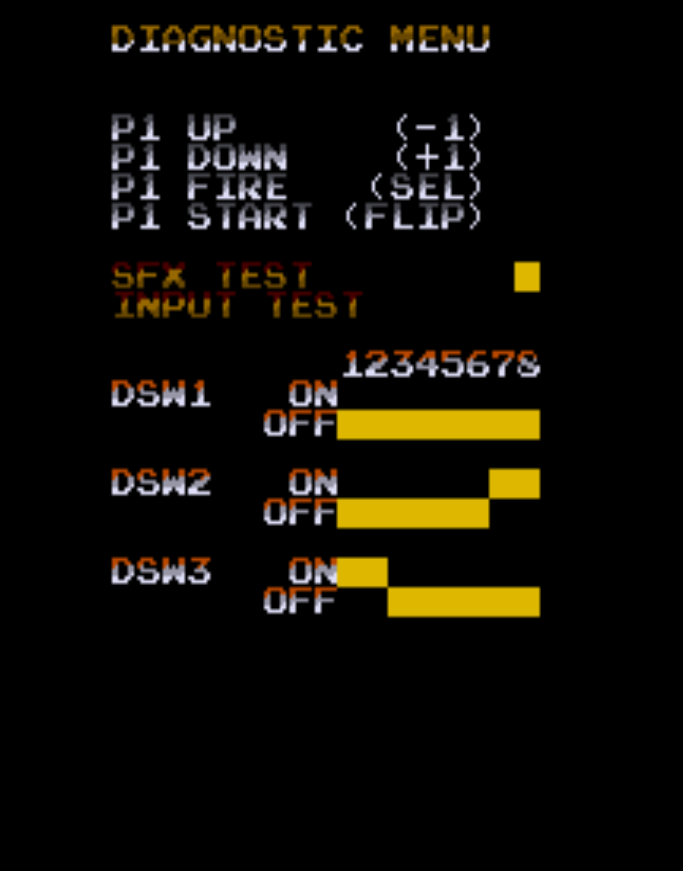
SFX counter broke after exiting character menu and re-entering SFX menu
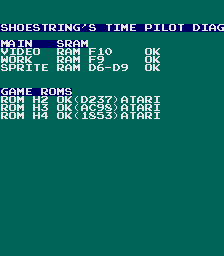
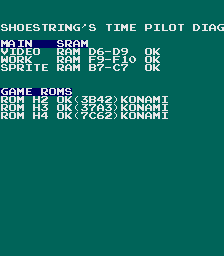
Wrong ram associations with pcb locations now fixed.
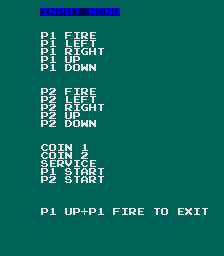
Holding down player 2 start during power-up enters diagnostic mode
Important: Porchy discovered that 0x1 needs to be written to 0xc308 or nothing shows up on the screen at all on a PCB. This was undocumented but now we believe the value 0x1 must be written during initialization of the screen. The latest release addresses this issue. Thanks to Porchy!
To fix: Some sounds still play after exiting SFX test to main menu.
Note: Diagnostic mode relies on good RAM and ROM for configuration data to facilitate the support of multiple Time Pilot versions in the one ROM. Do not rely on results from the diagnostic mode without sorting out issues associated with RAM and ROM first.
21/6/2015
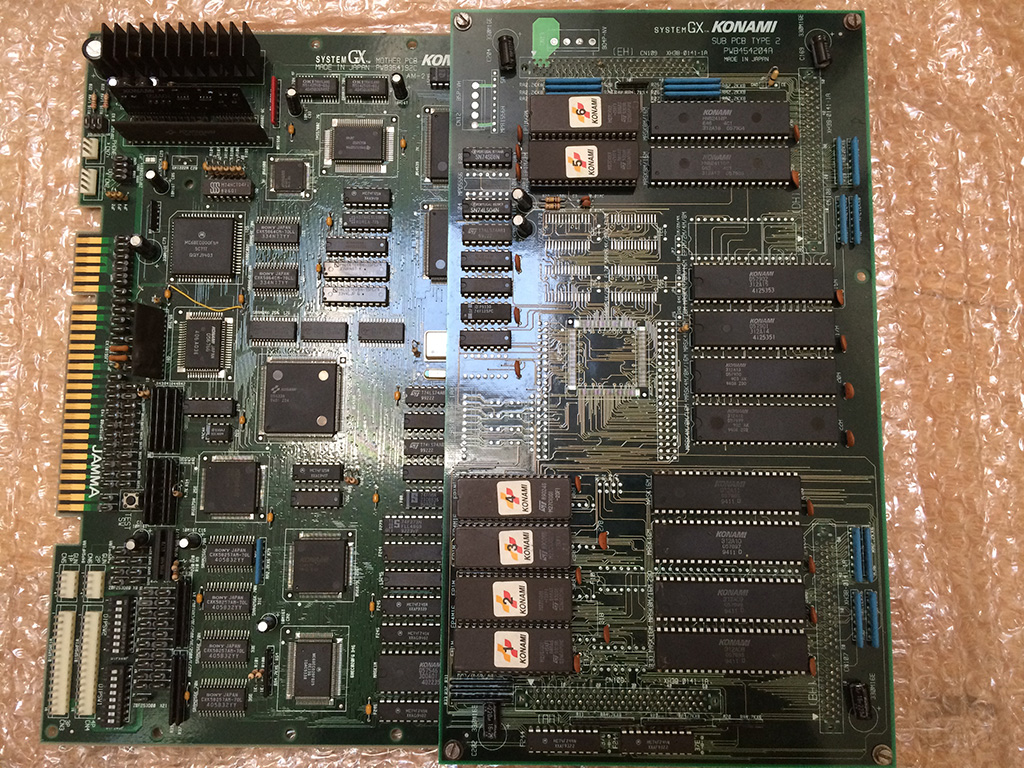
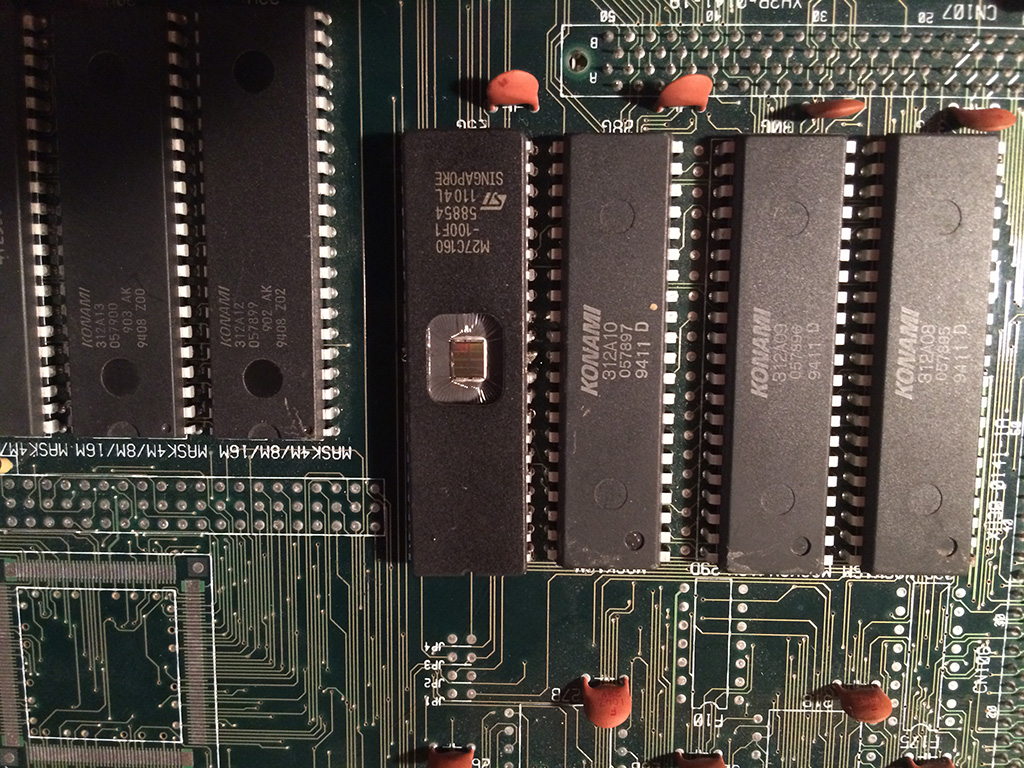
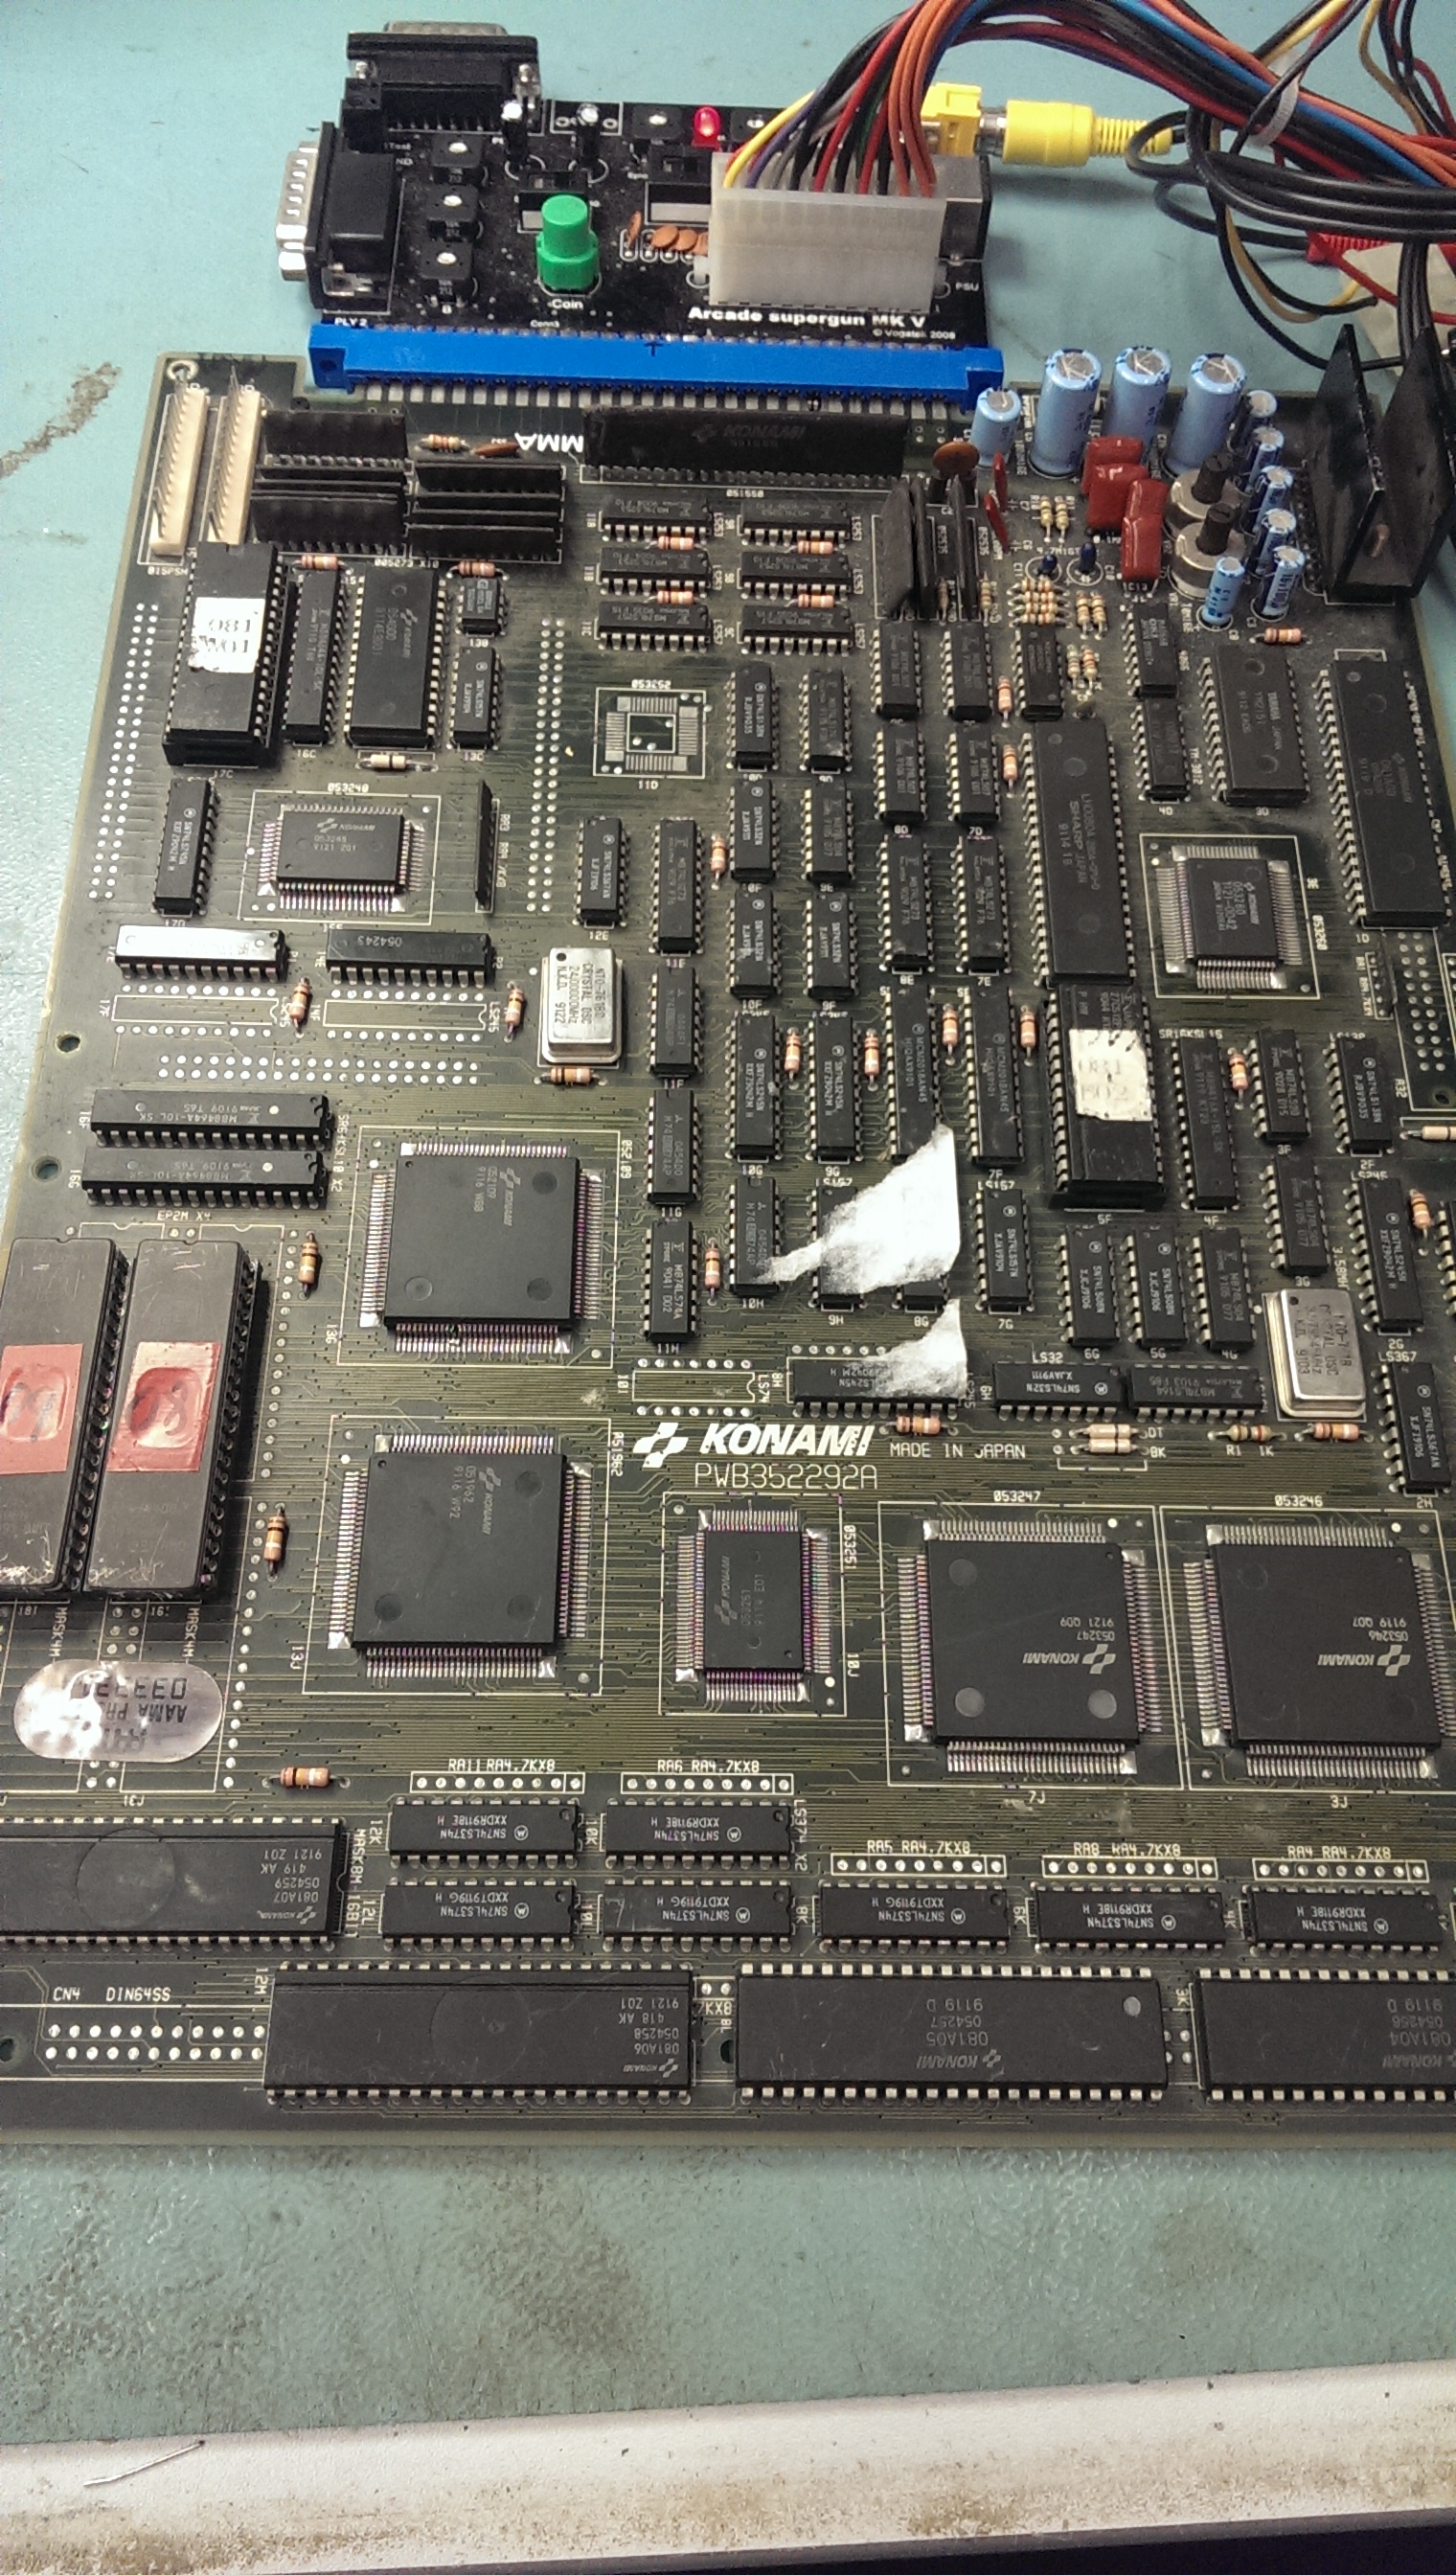
The EPROM ( a 27c64 ) once burned with this software installs on the CPU board @ 5H and can stay in there permanently if so desired.
Performs tests of the RAM & game EPROMs on the CPU board. This supports Konami and Centuri versions of the software, bootlegs are not supported yet.
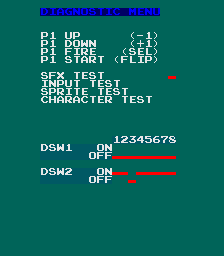
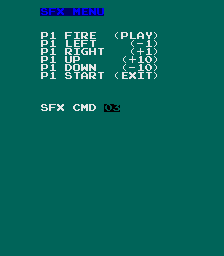
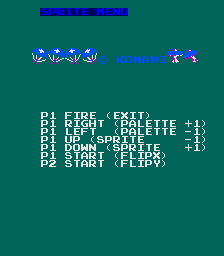
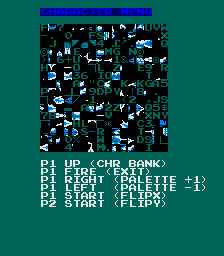
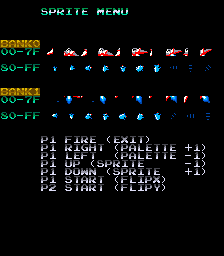
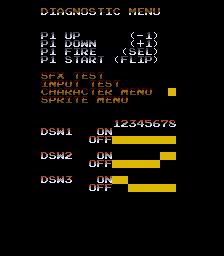
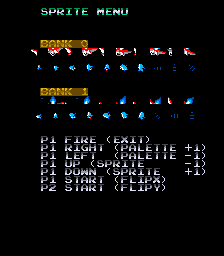
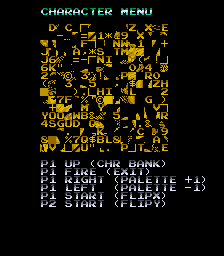
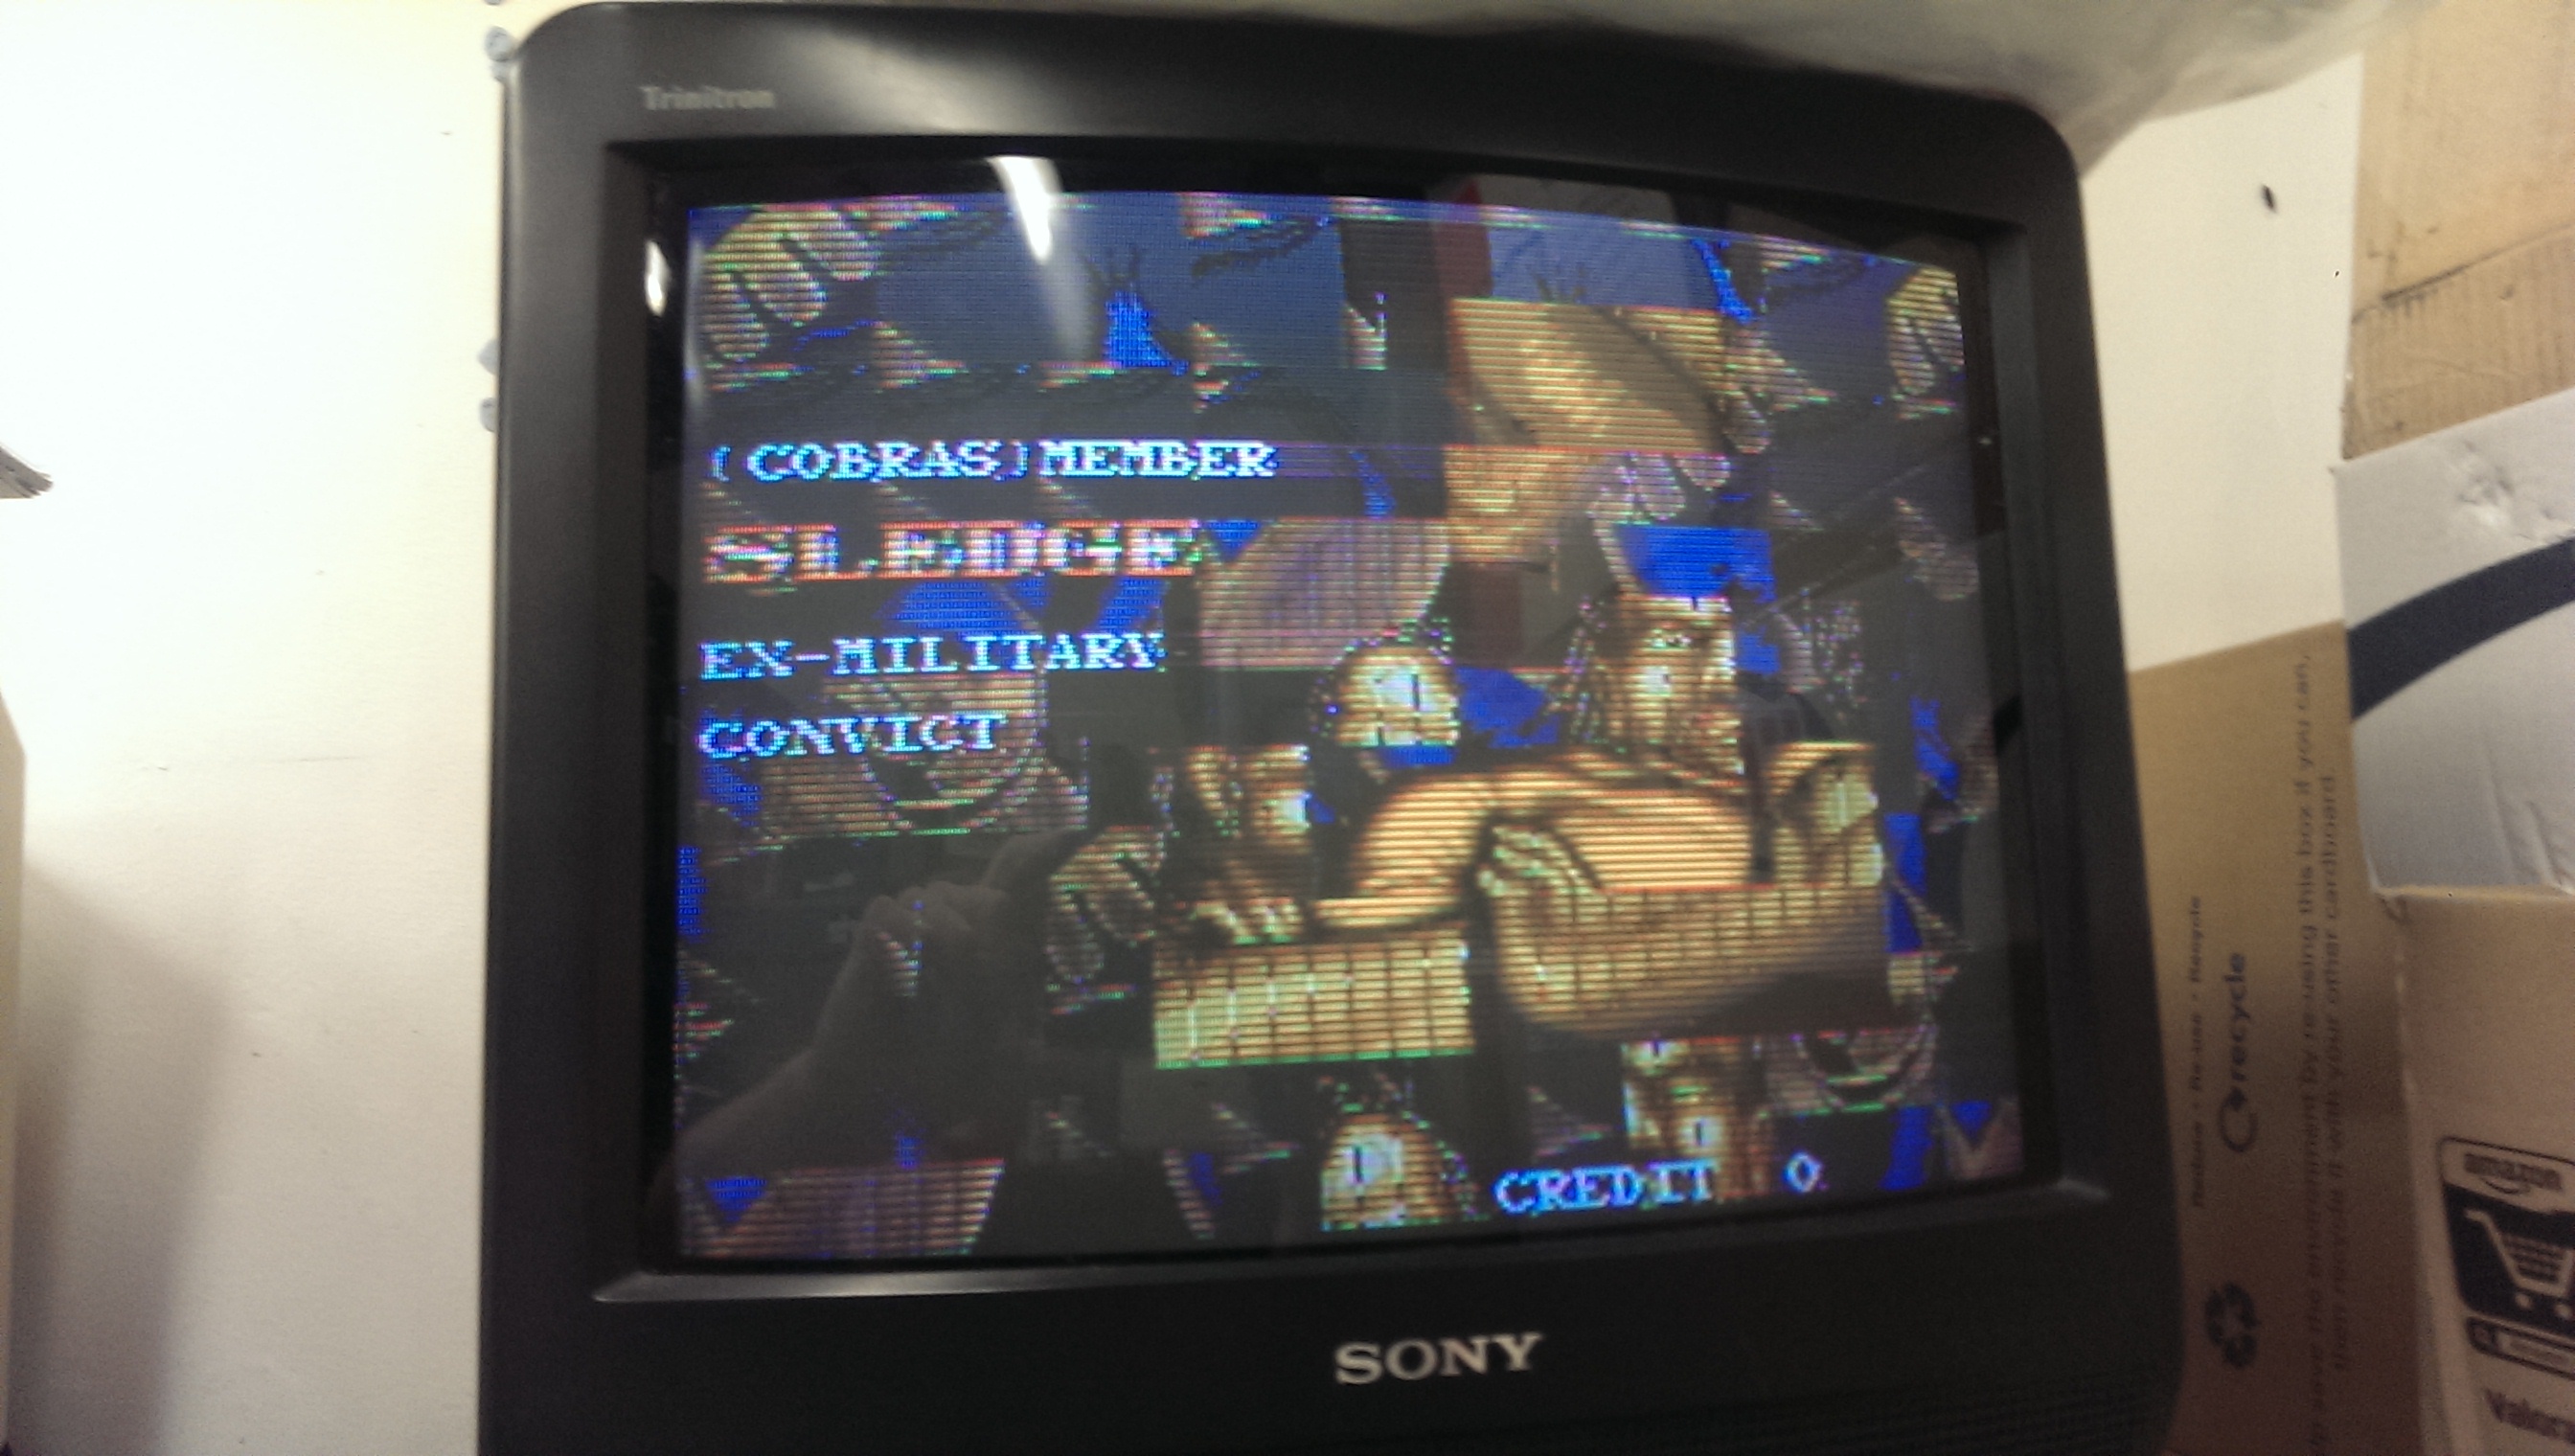
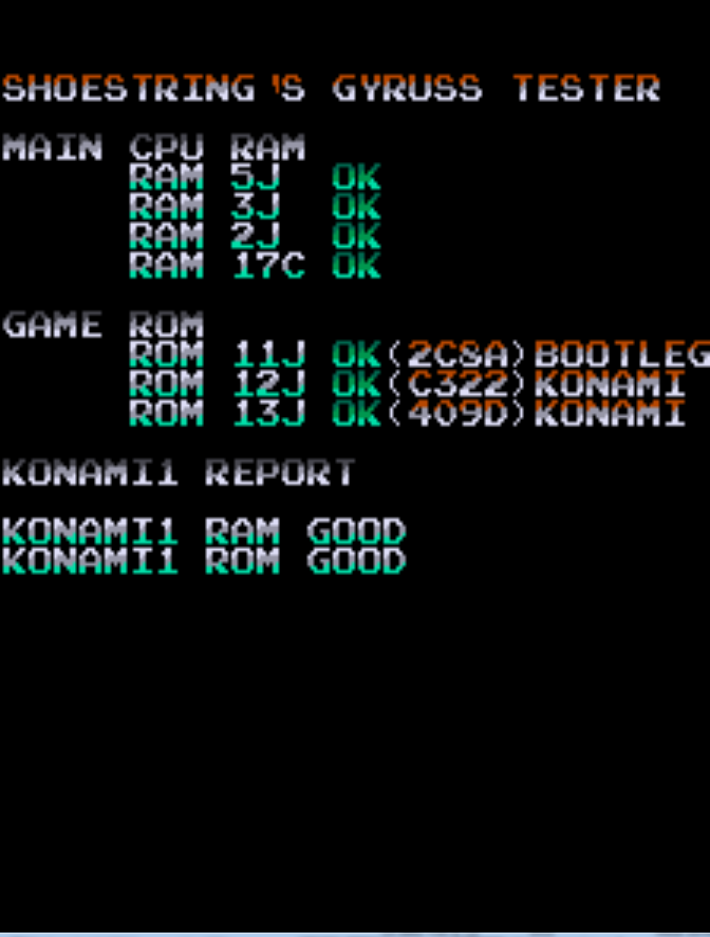
Also has a built in diagnostic mode for testing inputs, sound output and displays character & sprite tables. The diagnostic mode is accessible via DSW2. All dips must be on except for dip 3 to access the diagnostic mode of the program.
Would like to thank cmonkey for providing me with technical info which assisted me in being able to display the sprite & character tables properly. Also like to thank the MAME team for their hard work on the emulator which I used as a tool for debugging/testing purposes throughout the development of this program.
GeneralComments Off on Gyruss test/diagnostic rom update
Jun302015
16/03/2018
Minor fix.
Text references 8C instead of 19E when sub-cpu EPROM fails checksum.
Fixed output to reference 19E.
04/07/2015
Minor changes.
1.Holding down player 2 start during powerup will enter the diagnostic mode.
2.Some changes made to the presentation of the sprite viewer
30/6/2015
This update includes character and sprite test menu additions to the diagnostic mode. Useful for verifying bad tiles and sprites.
See roms section / downloads for update.
Had this board for a while now but hadn’t looked at it.
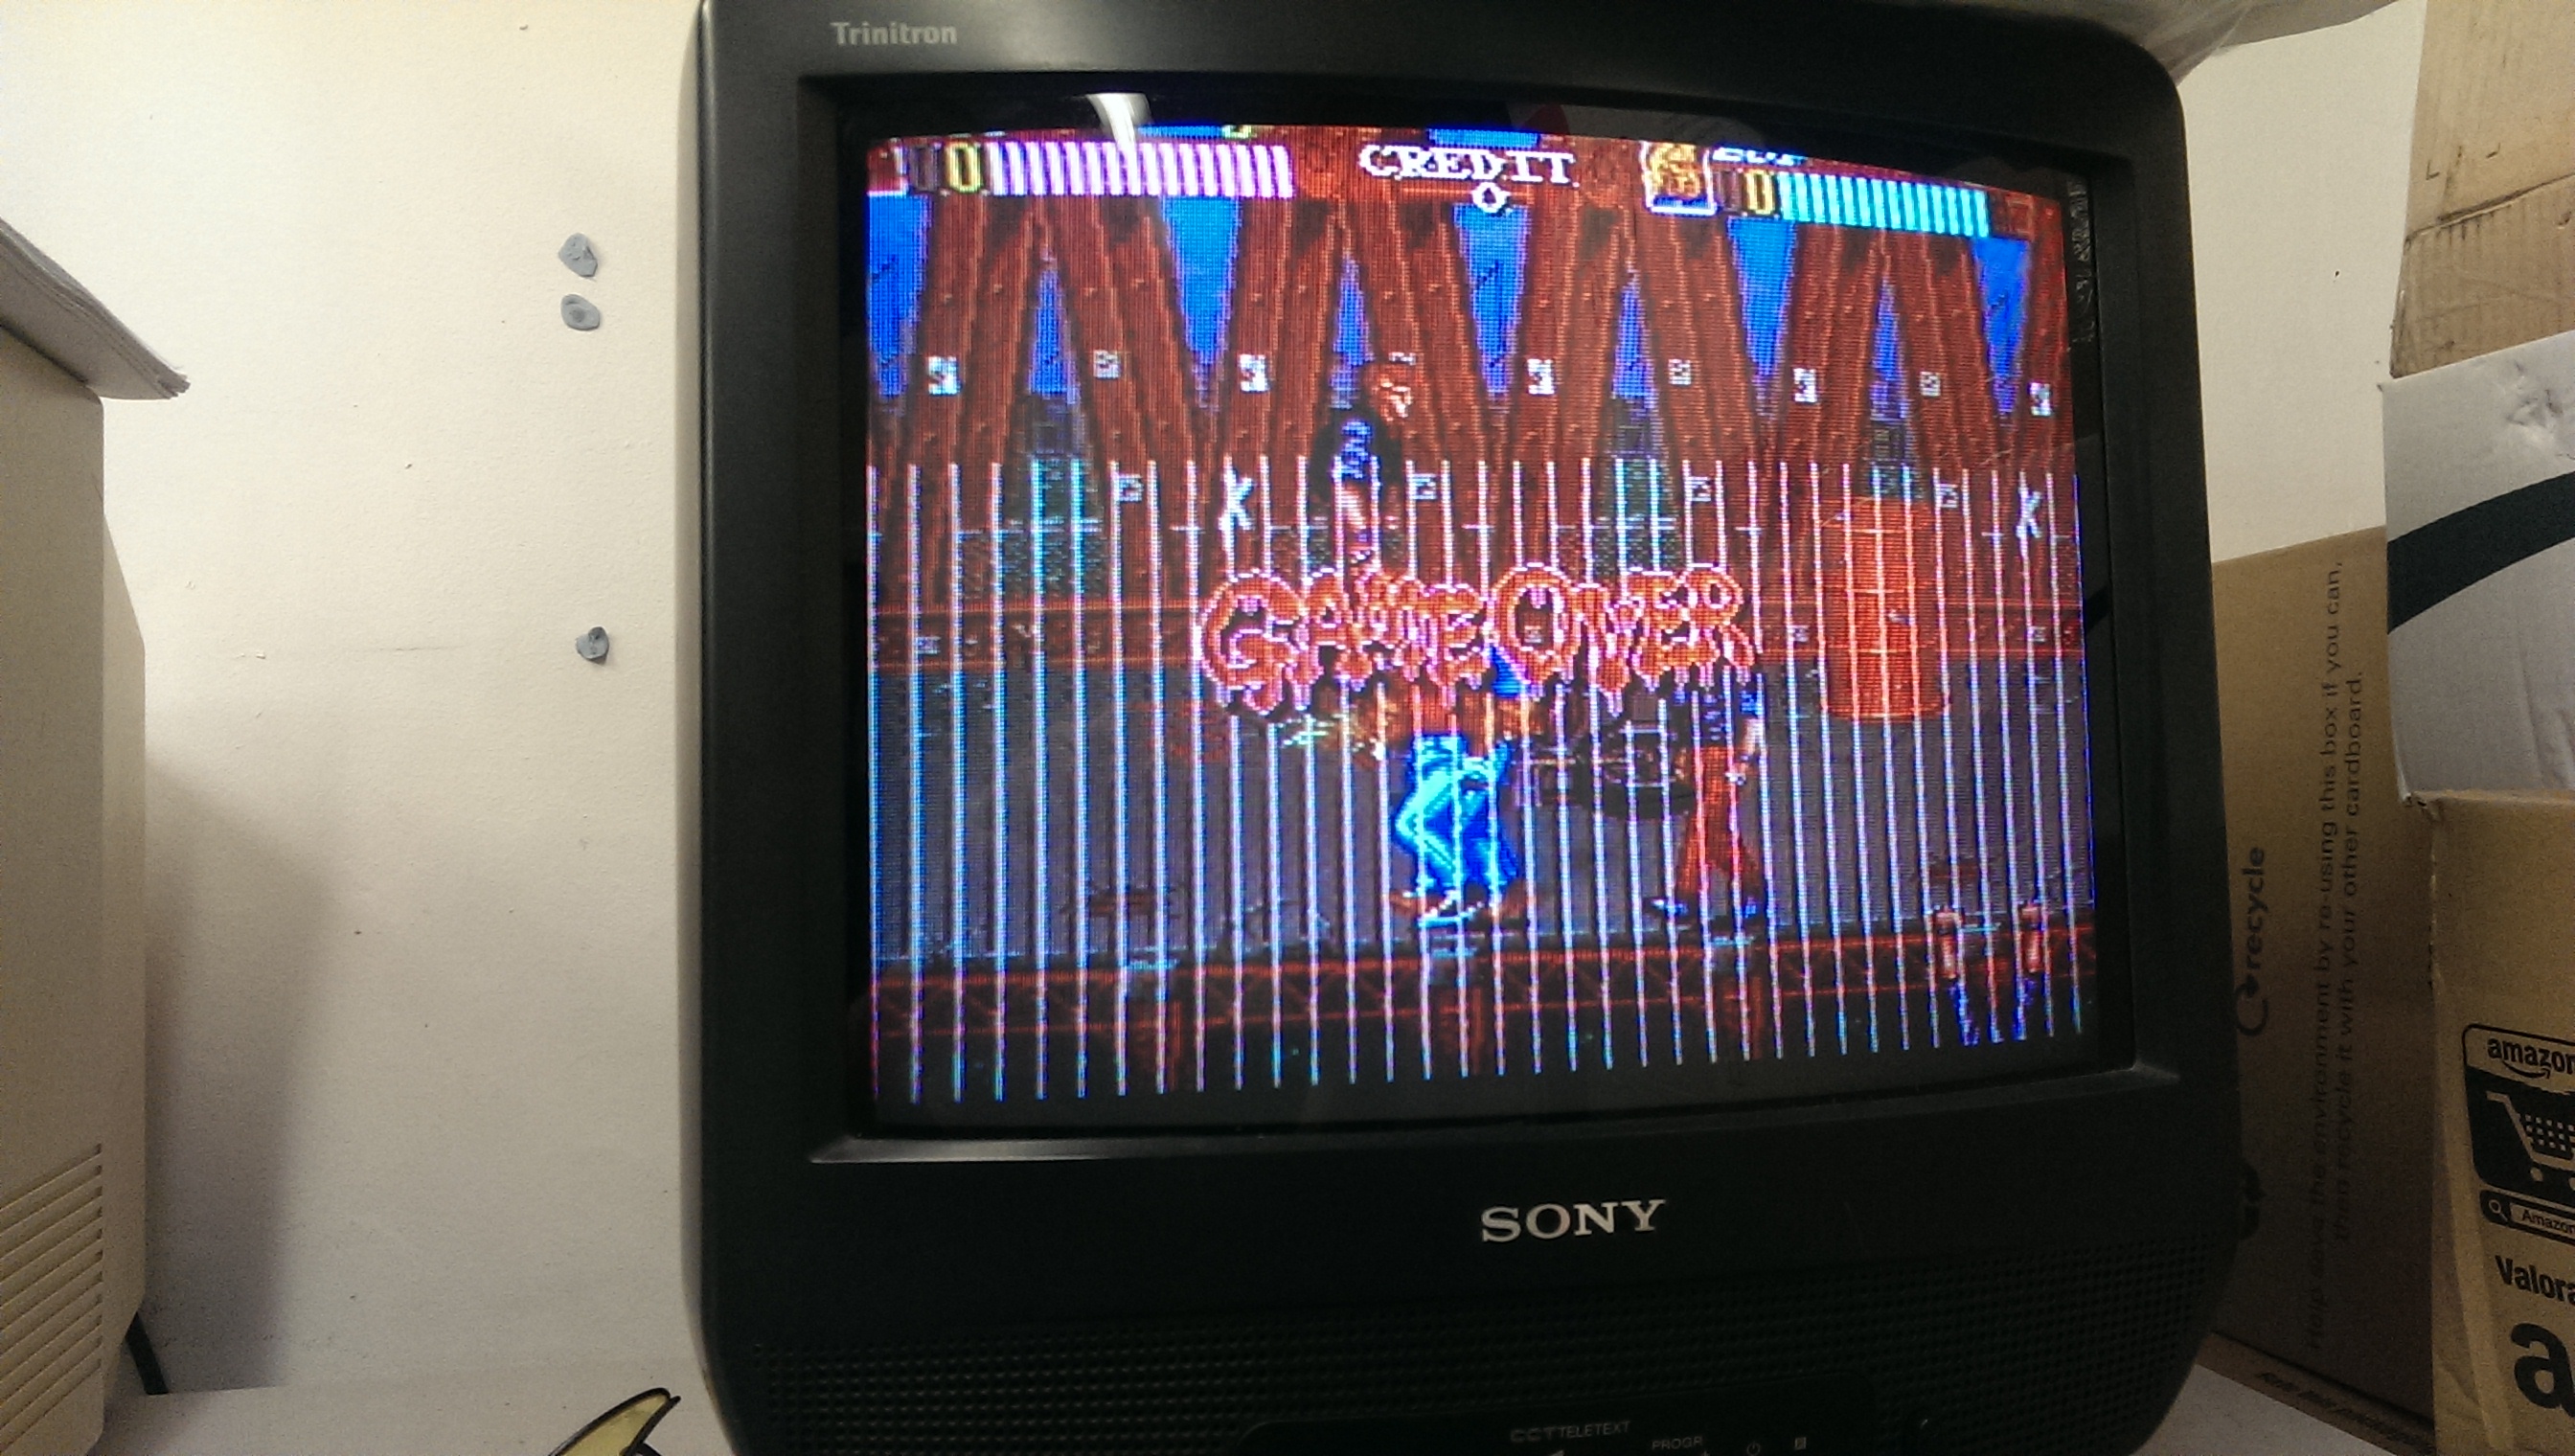
On booting the board up I got completely messed up graphics.
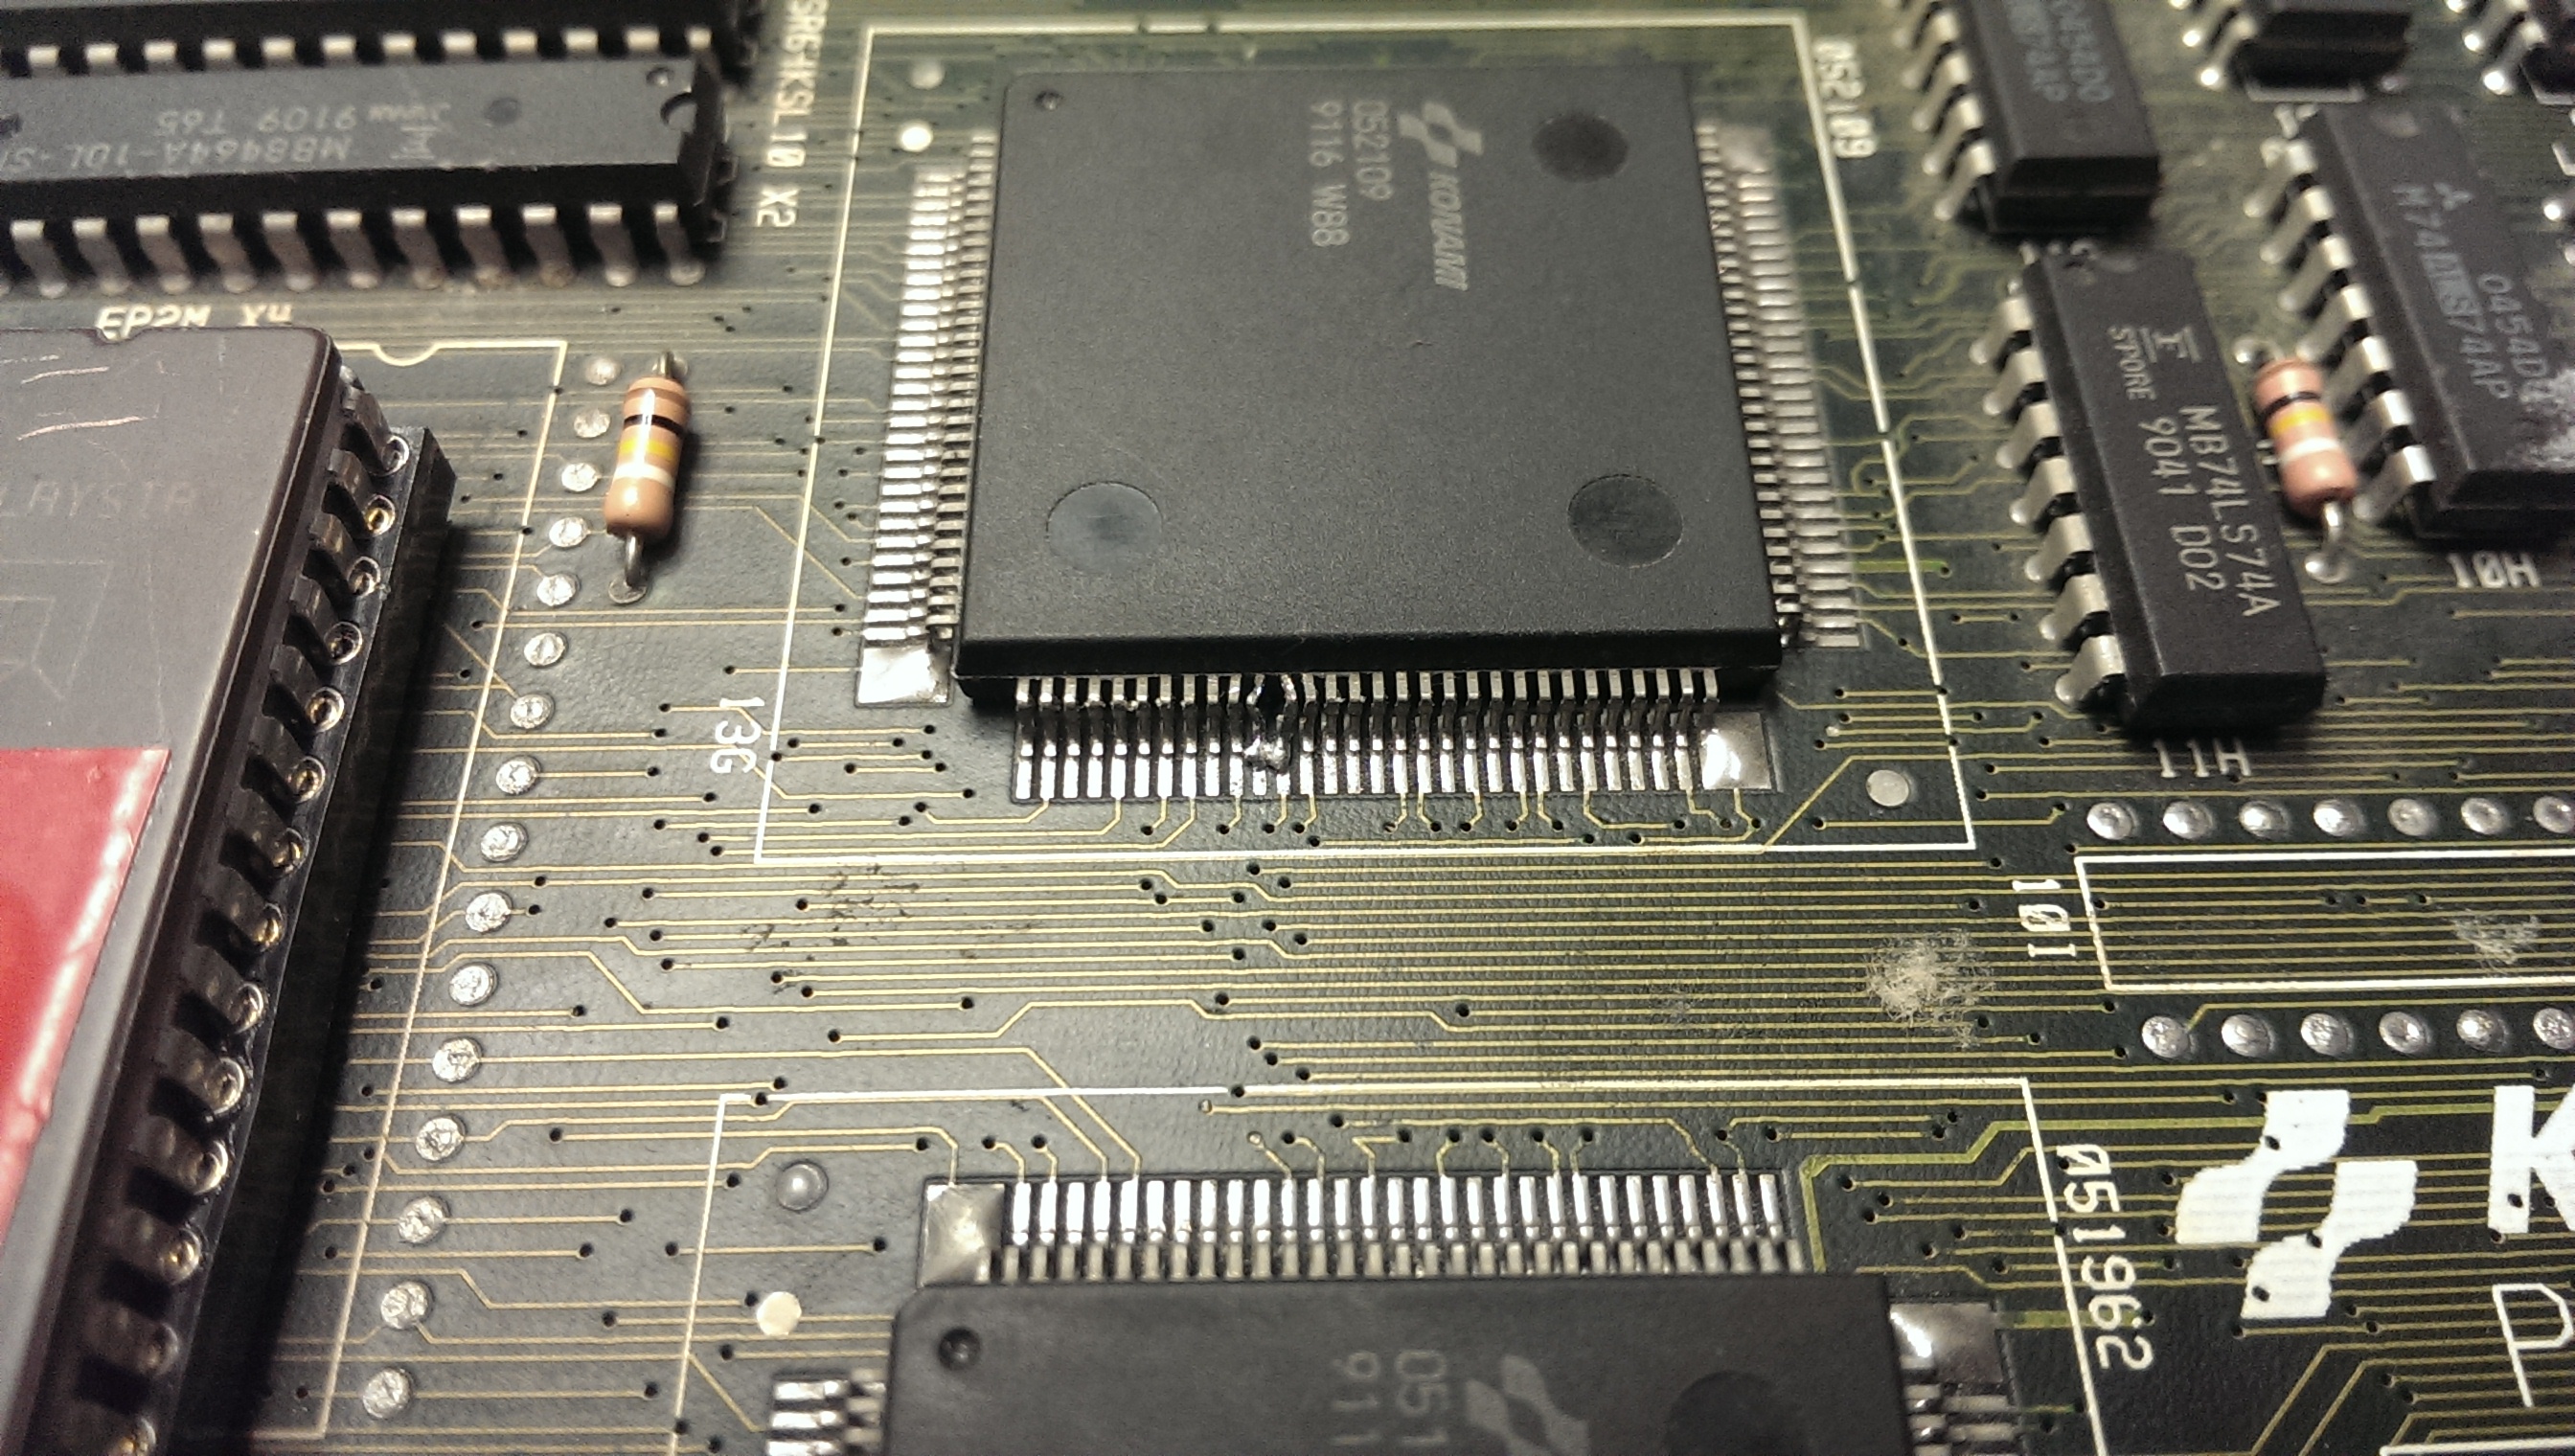
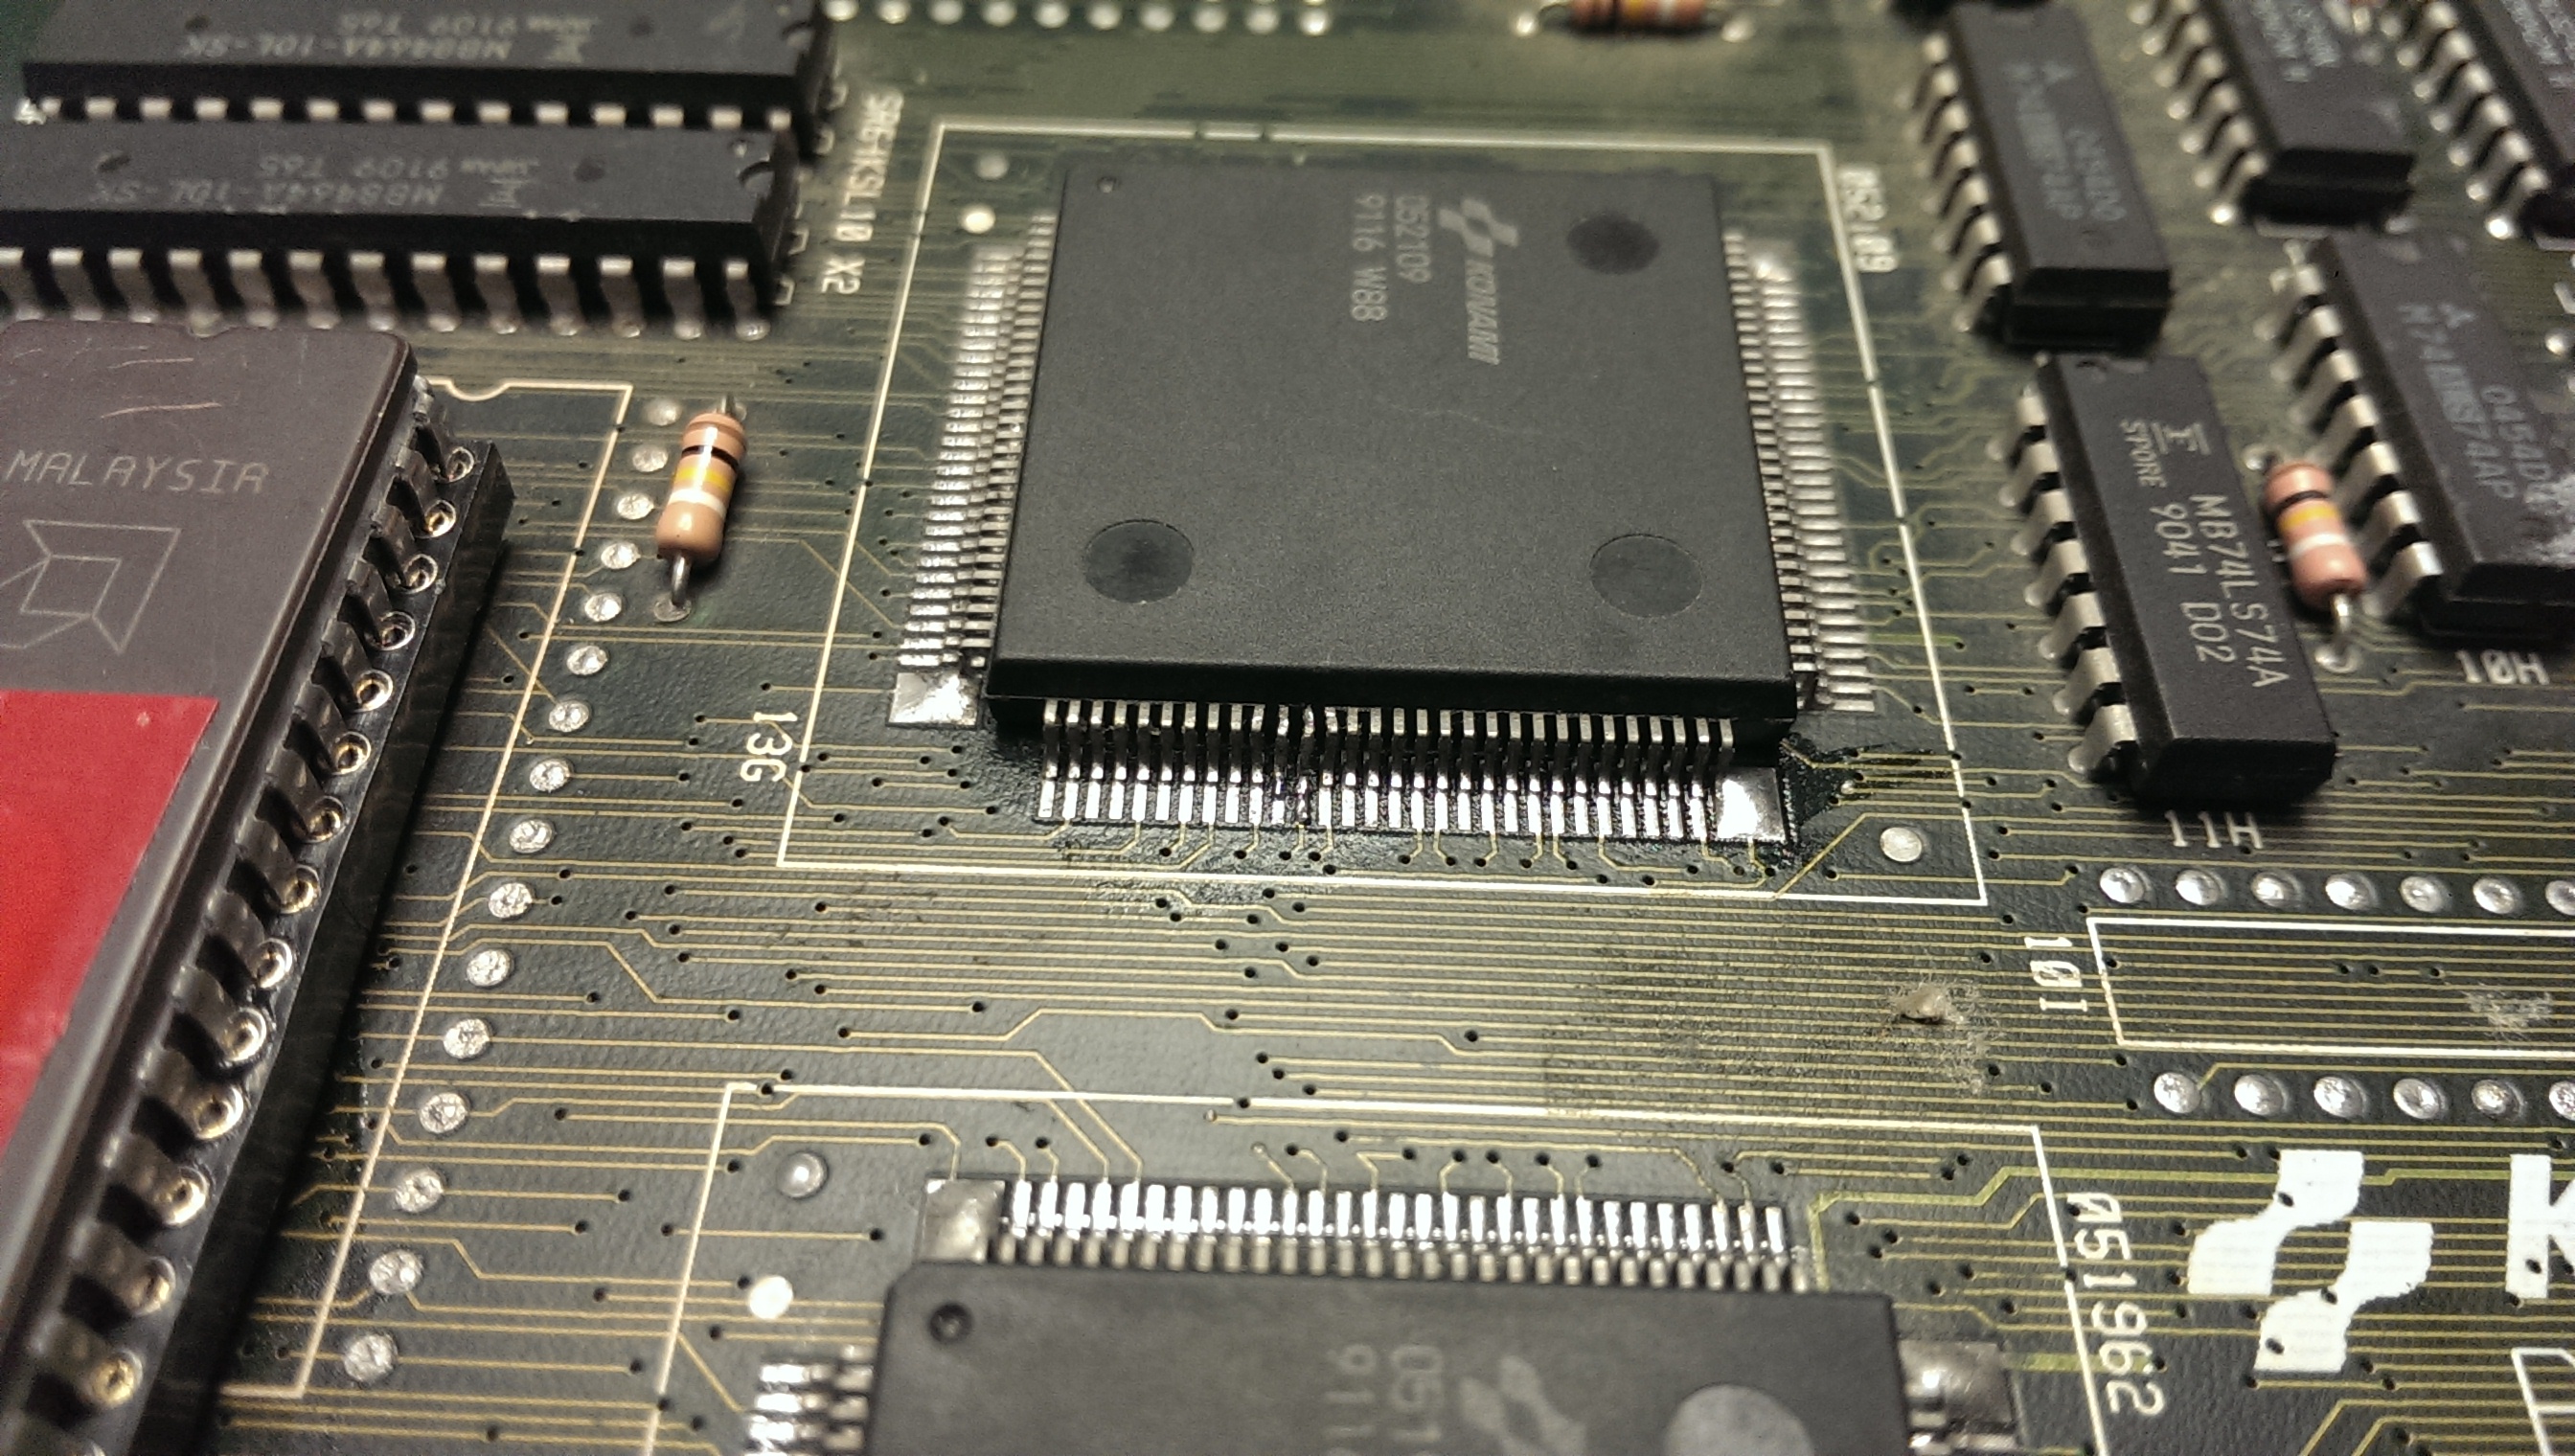
On my pre power up visual inspection I somehow missed the damage and solder blob on the 052109 tilemap generator.
I removed the solder using solder braid and straightened the legs up best I could with some fine tweezers. It took a while as I didn’t want to snap the legs off but I ended up with something I was happy with.
Fixing that gave me the graphics back but there were jailbars present.
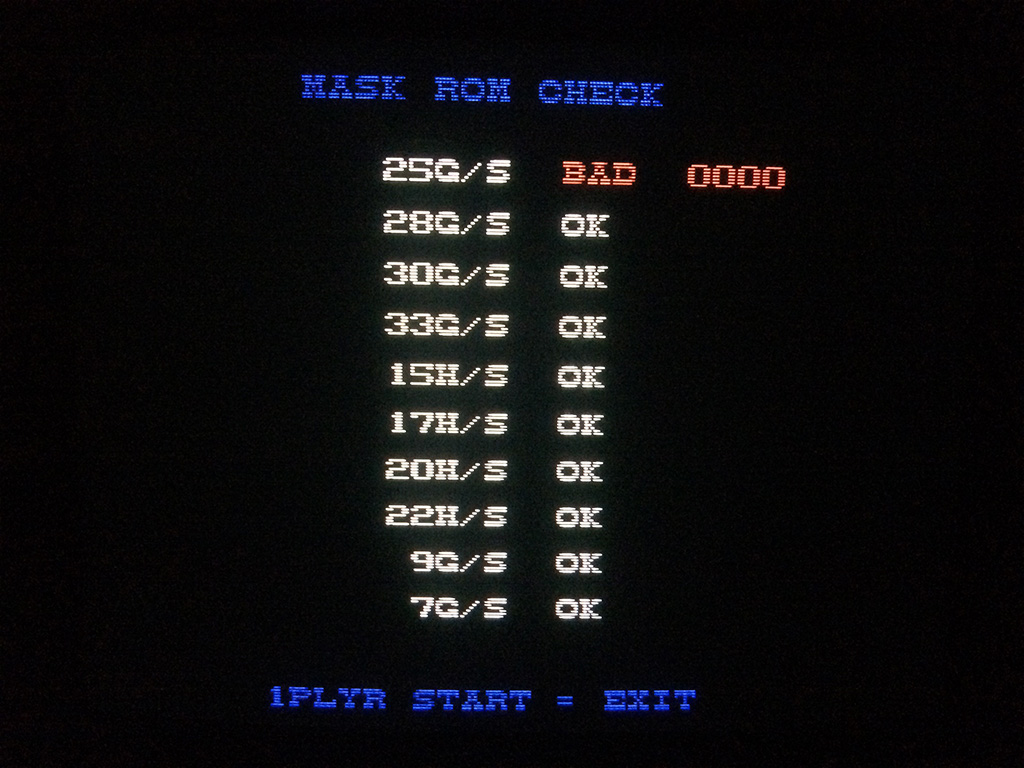
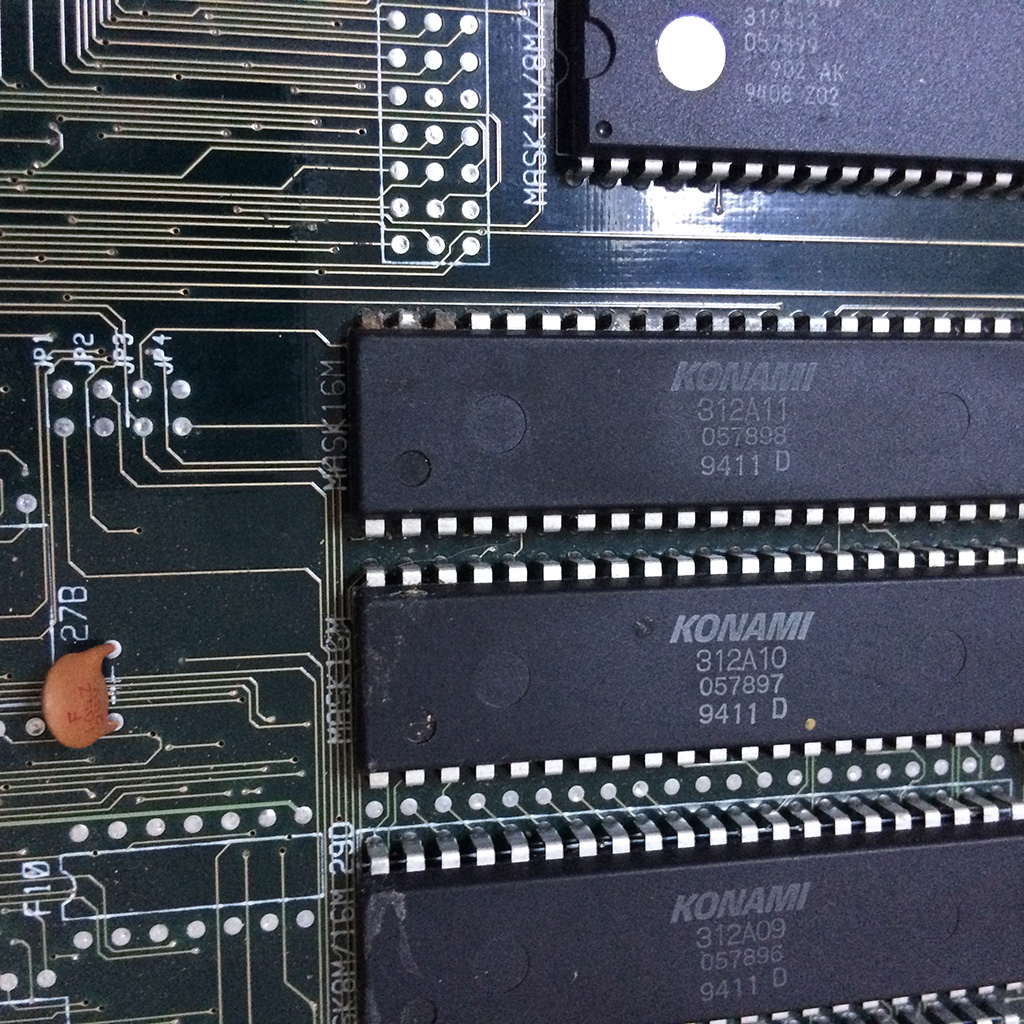
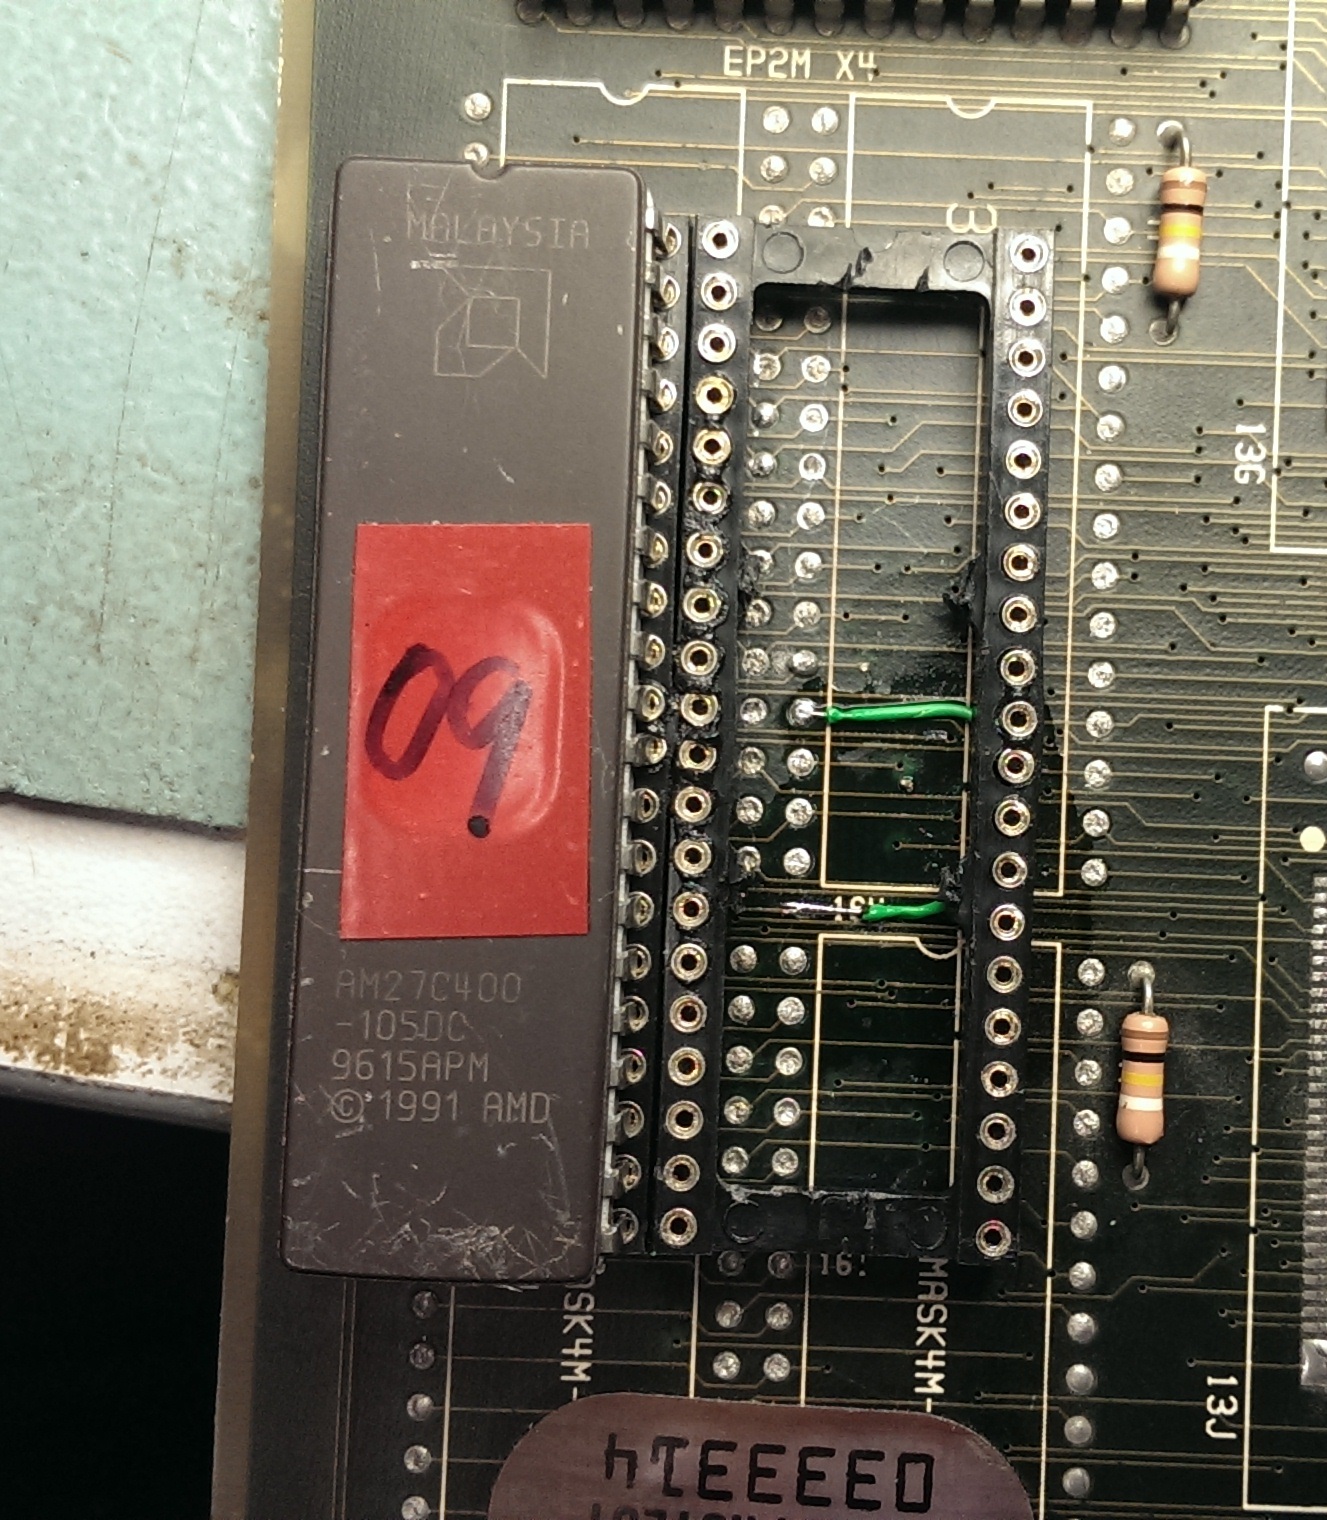
Jailbars are usually a sign of a failed ROM and as the two MASKROM’s have previously been replaced for a pair of 27C400 EPROM’s I thought it was best I check these out first.
Both turned out to be fine so the next step was to check the address and data line to see if they were active.
Again I could find no problems here.
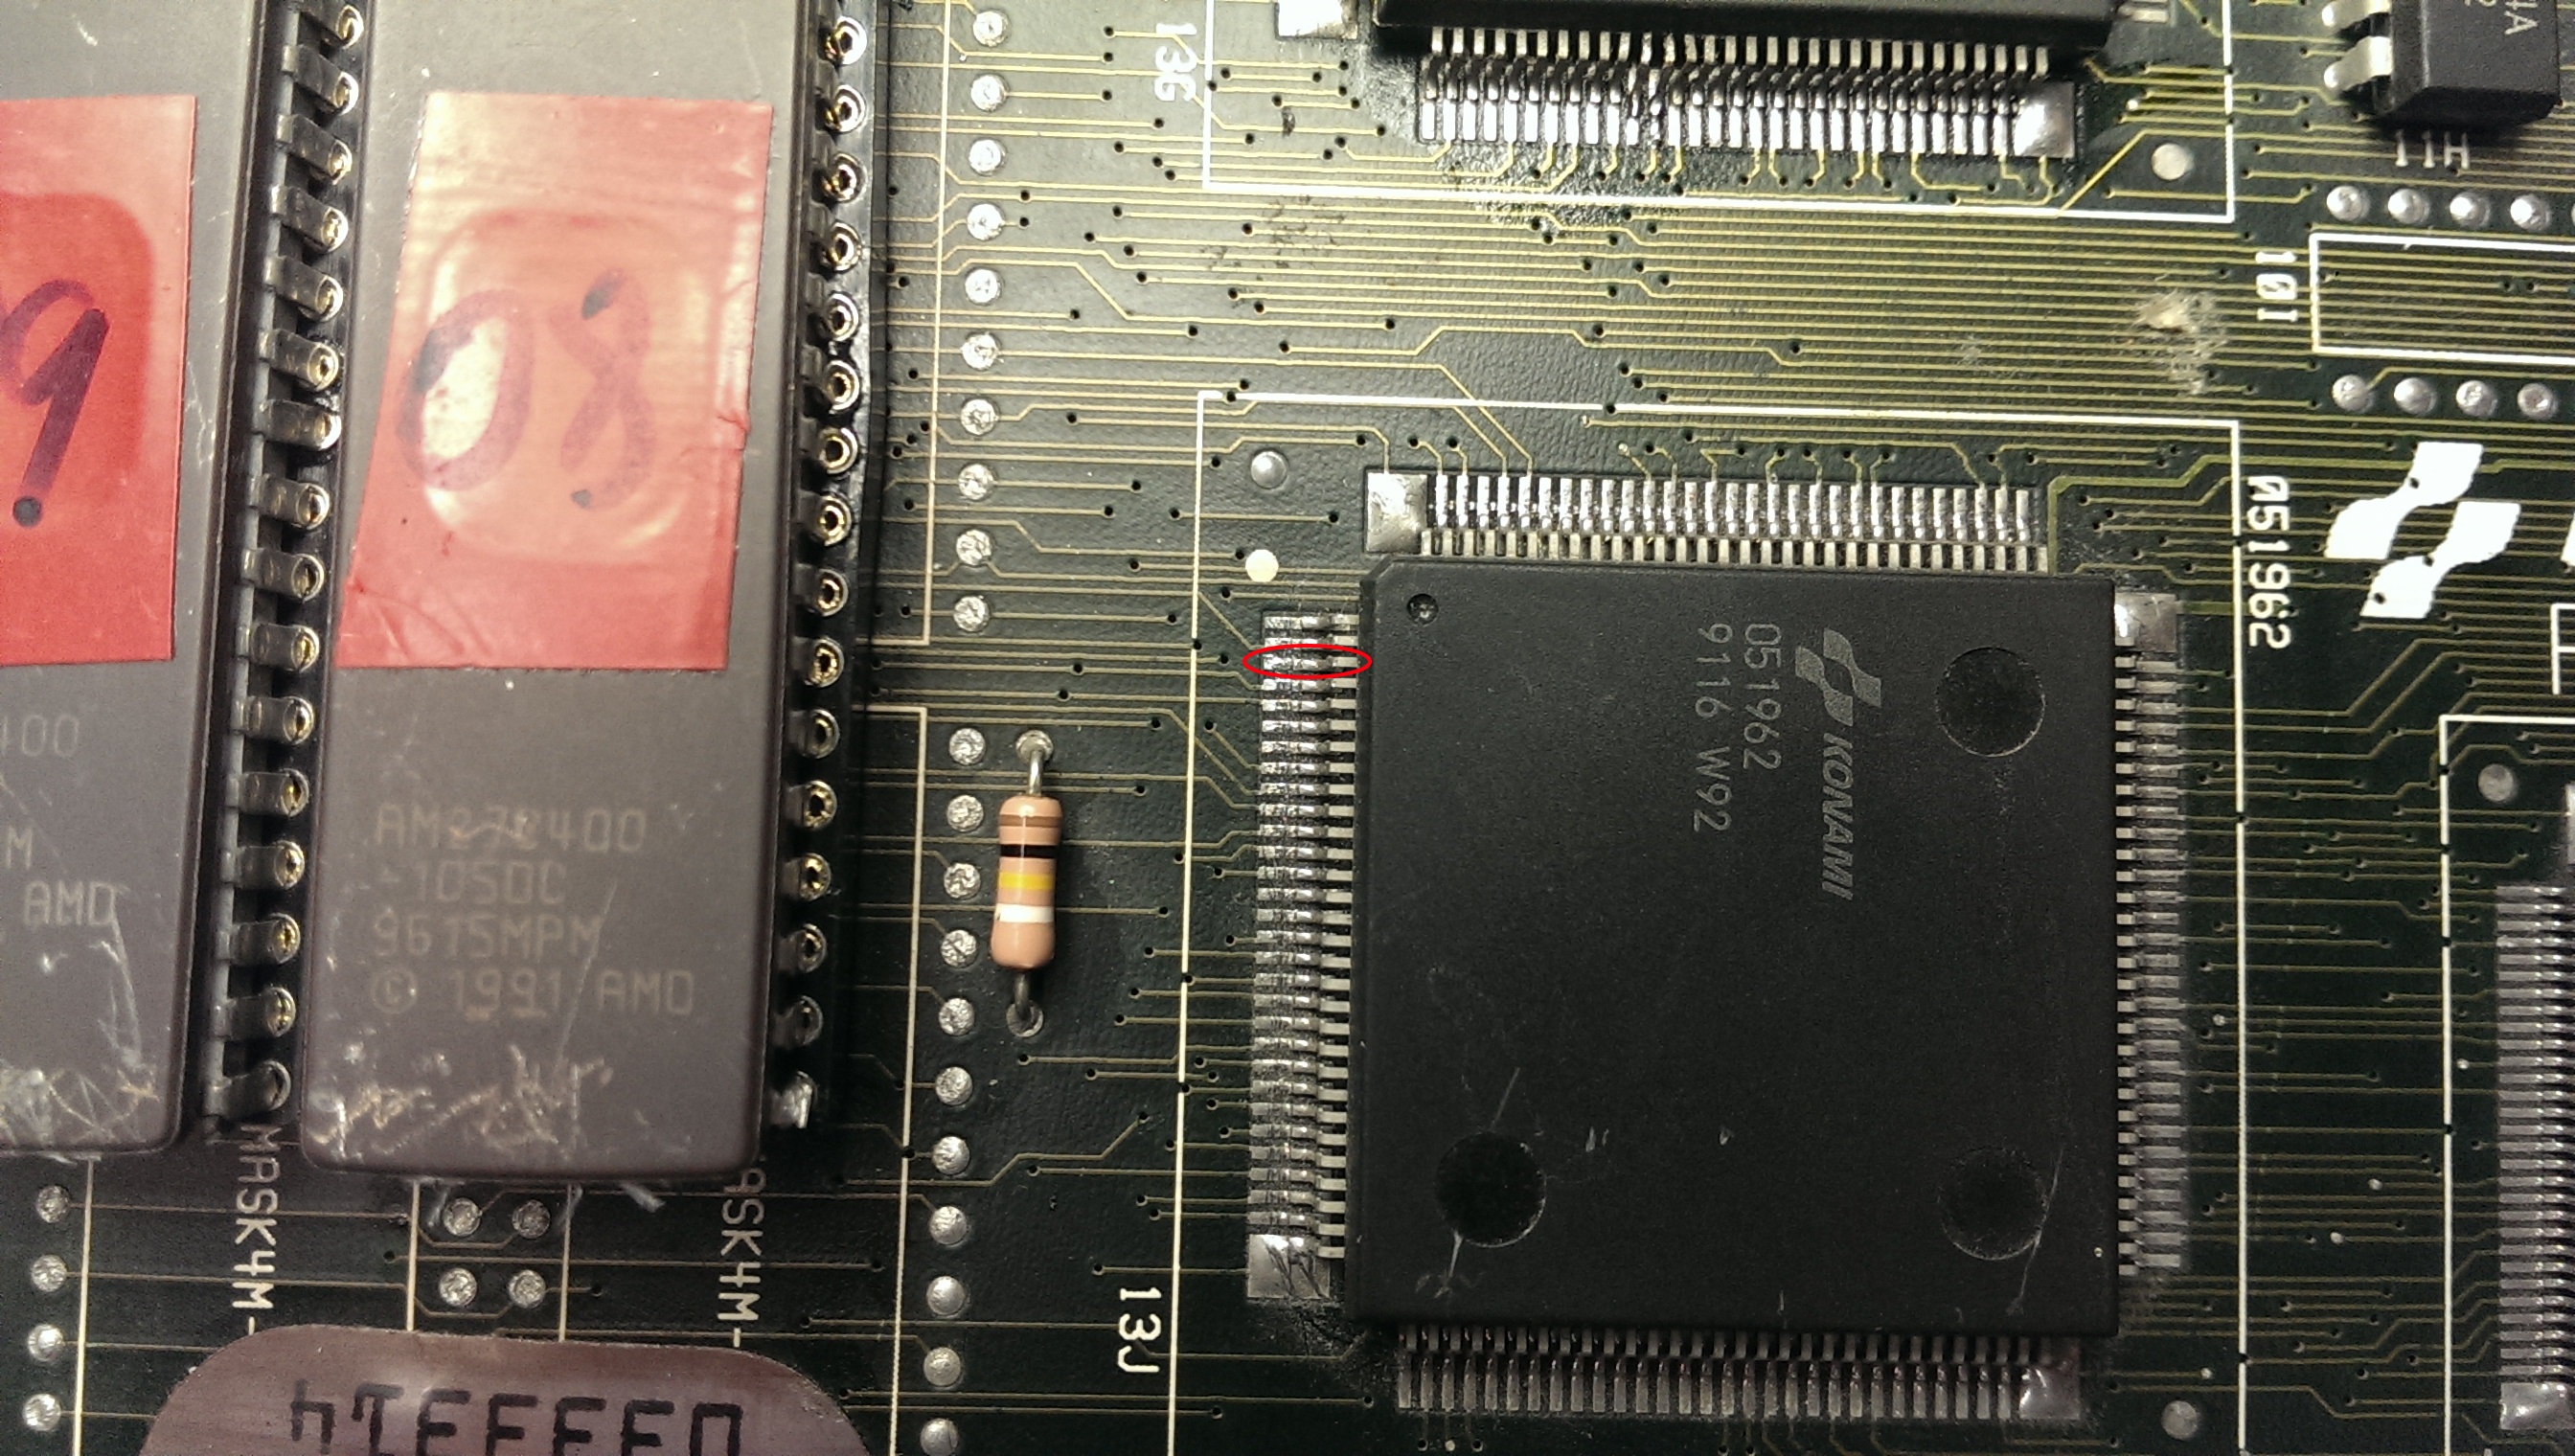
I then found the test menu which runs a self test on these ROM’s. The ROM at location 16I gave a different checksum each time I ran the test. A changing checksum can be a sign of a floating data pin. I already knew the data pins were active and that the ROM’s were good so I set to work with the multimeter checking continuity between the EPROM and the 051962 tilemap generator which these data line go to.
Eventually I found data pin 8 did not make it to the 051962.
I was able to patch this underneath the EPROM so it would be hidden (and protected).
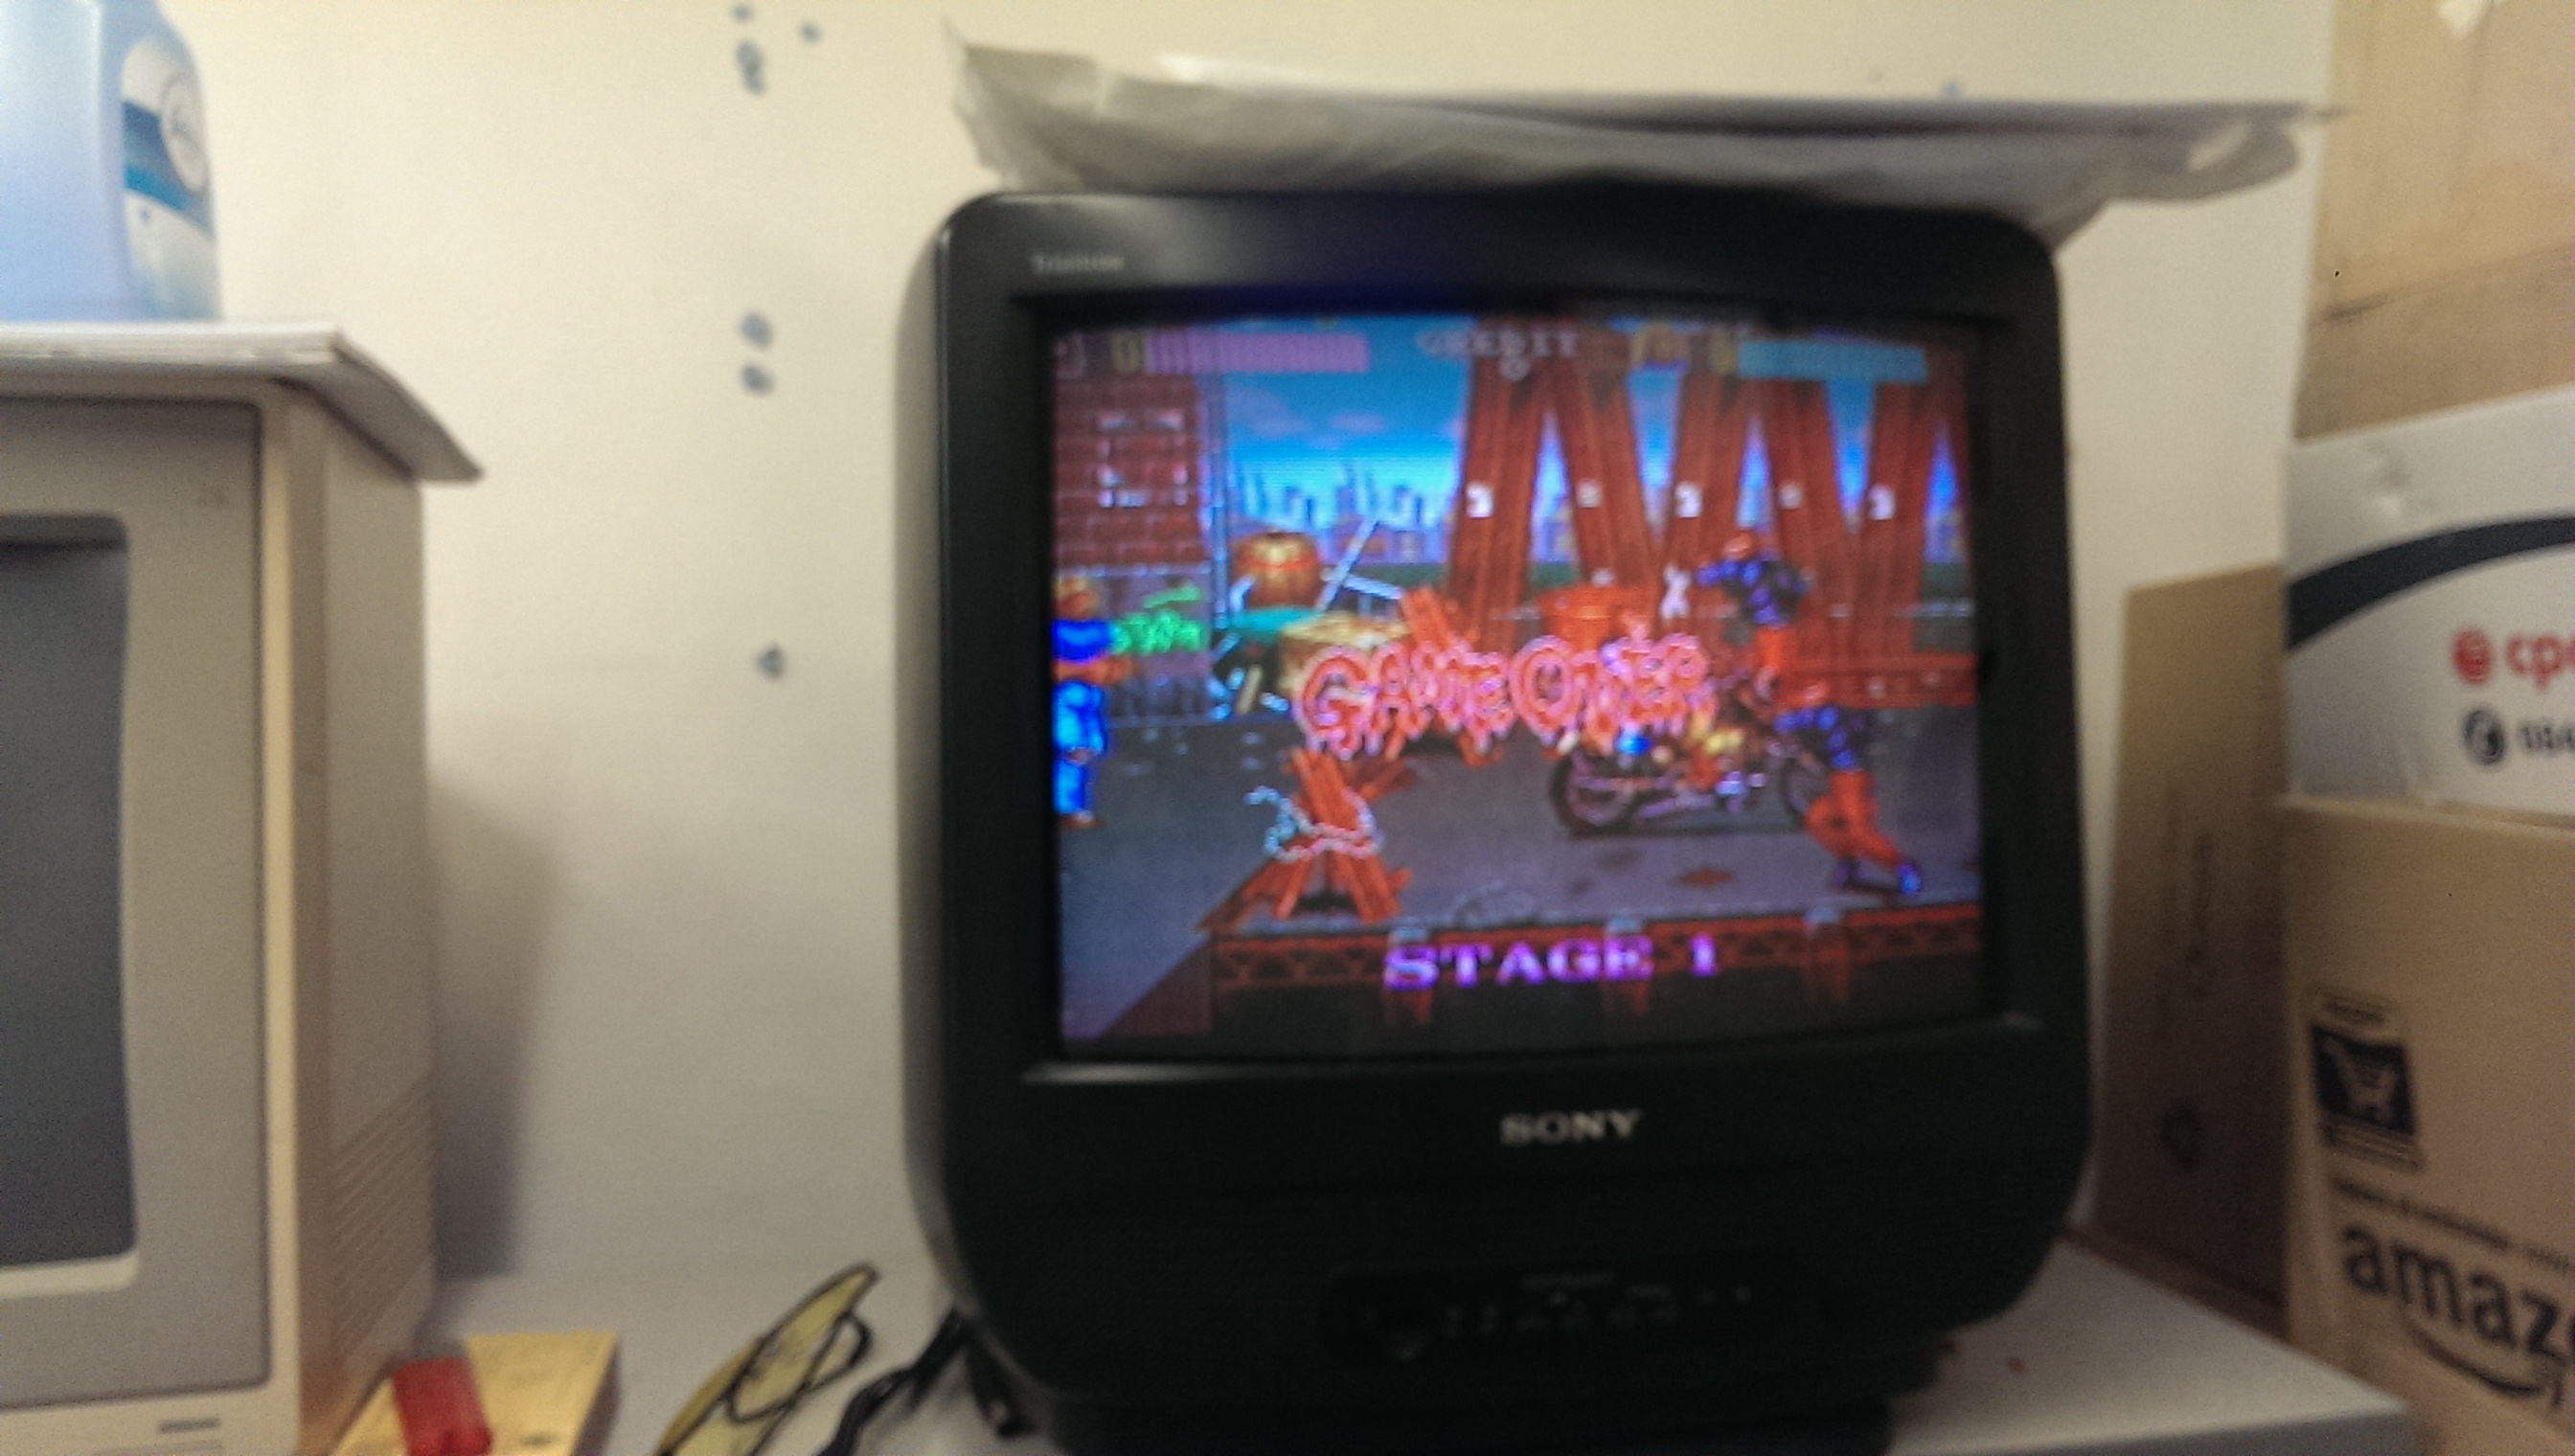
On powering up all the jailbars were gone and the board is fixed.
Text references 8C instead of 19E when sub-cpu EPROM fails checksum.
Fixed output to reference 19E.
11/04/2015
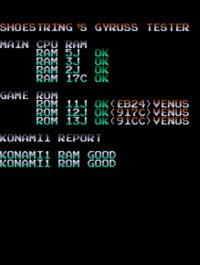
Support for Venus set added.
Bug fix – Addresses issue when 13J reports bad and prints NG twice, CPU gets lost and crashes game.
10/04/2015
Support added for bootleg ROM from the gyrussb set.
Single ROM labelled “1” at 11J. Other two ROMs are from the original Konami set.
See downloads for update.
4/4/2015
Bug: Sometimes index starts at 5 or some other random value when entering SFX TEST for the first time after power-up. The sound index is written/read to/from $9000 for cycling through 100 possible combinations.
Fix: Cleared this part of RAM before using it.
28/3/2015
1. Added flip to test cocktail mode.
2. Summary added to menu screen of dip switch settings
3. Added routines to check the stack ram @ 3J before moving on to further tests. Since the stack is used to perform further HW testing, execution is now suspended if a stack error is detected with an associated error message.
4. Diagnostic mode added via dip 2 of DSW3. Allows for testing sounds and inputs.
See downloads for update.
26/03/2015
Minor update.
1. Re-wrote much of the code up until where it verifies the work RAM. Purged CPU instructions that rely on the reliability of the the stack which is set to 0x9800 in the work RAM. ( work RAM is verified as good first before using the stack )
2. Background is set to yellow instead of black if video RAM at 5J is bad. This is to assist in troubleshooting. A sound effect is also played when 5J is detected as bad to add redundancy in case none of the light brown colour shows up on the screen.
3. Fixed the boot to As issue. When 13J is pulled it now reports as bad. This was fixed by addressing the issues resolved in 1.
Bugs
* When GY5 is pulled “KONAMI1 NOT RESPONDING” is displayed with no additional information. An additional message should be added to point out a problem with either the CPU, ROM or RAM on the 6809 side. The above is also reproduced by removing the 42 pin custom CPU. Random sprites are also present.
To do: Fix above mentioned bugs.
See downloads for the latest version
03/2015
Gyruss Test & Diagnostics ROM.
The 27C64 EPROM installs at 14J on the CPU board. It performs a series of RAM & ROM tests to identify any problems & will attempt to boot the game once tests are completed regardless of failures found. The EPROM can stay in the socket and it does not interfere with the game in any way once the game starts.
Use at your own risk if you’re using the highscore kit, this will delete your scores as it will performs a series of writes to the NVRAM.
I would like to thank cmonkey & DarrenF on KLOV for providing valuable information & help regarding the hardware. I would also like to thank the MAME team for their great work on the emulator and the Gyruss driver, without these cool debugging features in MAME development of this ROM would not have been possible.