
23/6/2015
In my previous repair I replaced a single capacitor to get the monitor working but this fix would prove to be temporary and only last a couple of months before something would go horribly wrong. The monitor is over 20 years old after all, so that was to be expected.
Several weeks ago I observed the monitor switch off for a split second and then back on, I thought this was strange but I knew something inside was on the way out. Since then strange lines would appear on the screen for a few minutes after power up.
And more recently, I was in the middle of playing SSF2 when the monitor totally crapped out on me all of a sudden, the screen went blank and the power led went off. There also was a high pitched whine coming from the monitor which is common when the FBT dies in these monitors, or so I read on the various C= forums. When powered off the high pitched whine would gradually decrease in pitch until it was no longer audible.
On to the repair. After opening the back of the monitor it was important to take the necessary precautions. All parts and tools were placed against the wall away from my work area ( the floor ) to create a safe working environment and prevent injury or damage to any components. I don’t have a large enough work bench so this was the best I could do with what I have.

Tools used for this repair
- flat head head screwdriver, automotive gauge wire & alligator clips ( used to discharge the CRT )
- 240v 60w globe – series light bulb trick ( used to limit current ). 100w would have been better but I couldn’t find one.
- DMM
- Goot soldering station
- Goot solder pump
- 60% tin 40% lead solder
- Plenty of coffee & biscuits were consumed in the process
The next step was to discharge the CRT to avoid electric shock or worse. See my previous repair log for information on discharging CRTs. There is a link to a video by John’s Arcade which takes you through all the necessary steps to safely discharge it. Please do not do this if you are not confident or competent. You can get a nasty shock!
CRT discharged and anode suction cap removed from the tube. Discharging takes a fraction of a second with the screwdriver & attached wire from the screwdriver shaft to chassis ground of the monitor. Wait 10-15 minutes and repeat the discharging process to be safe or you can allow the flat-head screwdriver to maintain contact with the anode cap terminals and walk away for 15 minutes and do something else for awhile, like make a cup of tea or coffee.
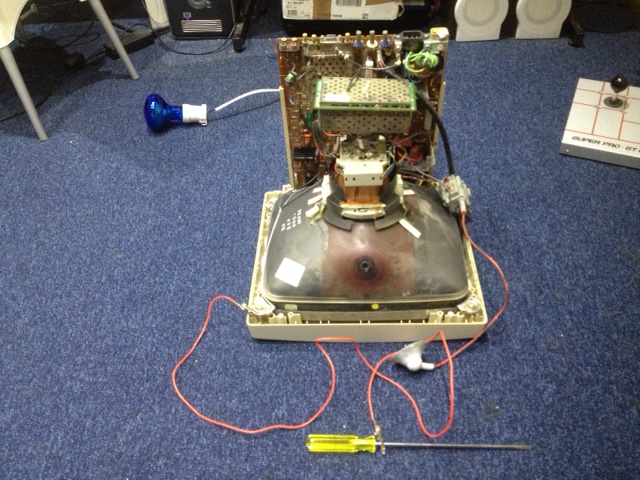
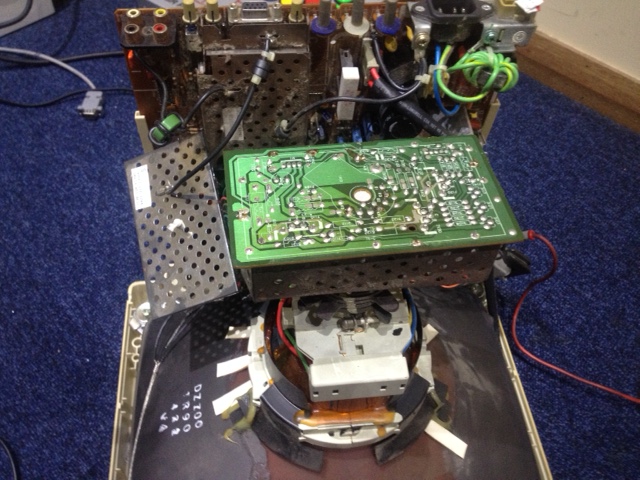
Once discharged I then completely removed the FBT ( AT2079 37591 ) & the HOT ( horizontal output transistor – D1577 ). I also removed the neck board from neck tube which is required.
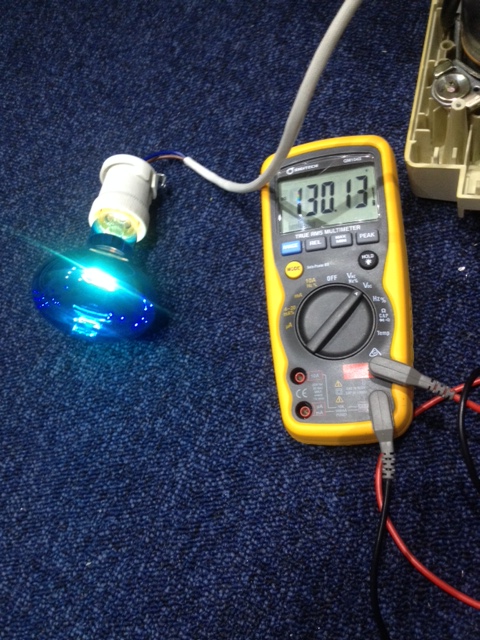
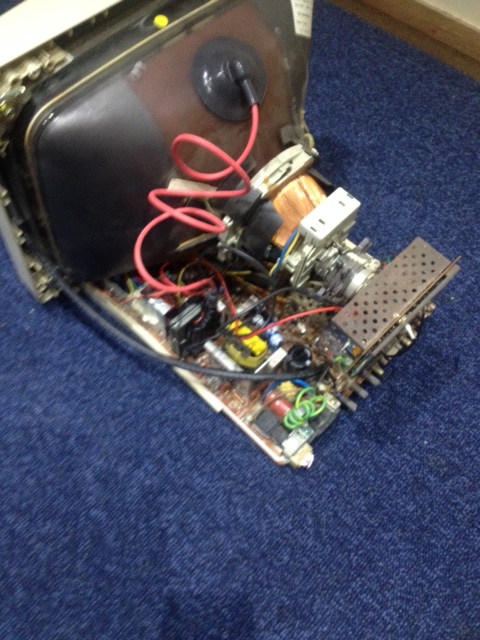
I wanted to test the power supply under some load. I soldered a 240v 60w lamp to the b+ ( to live ) and ground ( to neutral ) at the pads of where the FBT was installed. Pin 3 is b+ and pin 11 is ground.
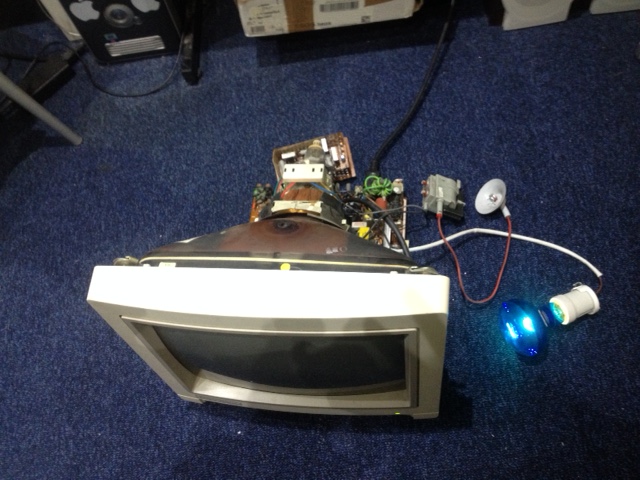
At least the power supply section looks good with the load. I measured 130vdc across the cap at 2451.
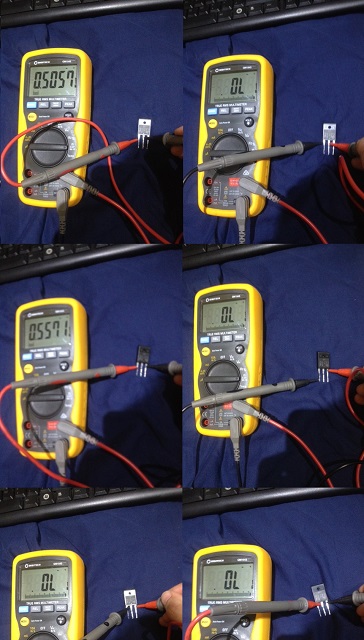
I decide to look at the HOT which can also fail and take out the FBT in the process.
The D1577 HOT looks good to me but I have already ordered a spare just in case I need them. The BU508A is also suitable and was actually used in the same model. I ordered the BU508A
I’m confident the flyback is bad. I ordered a hr7533 ( which is a suitable replacement for the AT2079 37591 ). Since I am in Australia I found a supplier of the LOPT at Wagneronline instead of ordering from abroad which is handy for us Aussies if you happen to be one and are reading this. https://www.wagneronline.com.au/hr7533/9/ps/
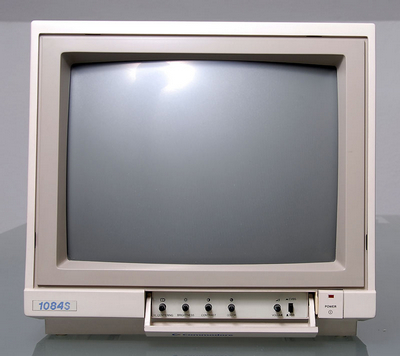
If you have the earlier version of the 1084 shown below with the on/off switch on the front ( 1084S-P ) then the replacement flyback is the hr7506 which Wagneronline stocks as well.
24/6/2015
Wow that was fast shipping, 1 day from Sydney. So I really couldn’t wait to start working on the monitor this afternoon.

The next step was to remove the wires from the FBT to the neck board. To do this I had to de-solder and remove the RF shield first.
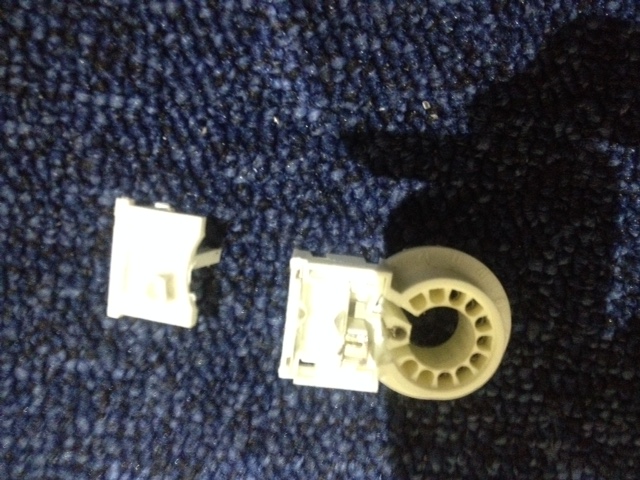
One of the wires from the old FBT to the neck socket snapped, so I had to remove the neck socket from the panel to remove the broken wire, no big deal 🙂

The socket had to come apart to get the small piece of wire out. With patience I succeeded in getting the wire out without destroying the socket.
After re-assembling the neck panel and soldering the two wires from the FBT to it, I soldered the 7 pins of the FBT to the main PCB. Then soldered in the new HOT and attached the clamp which holds the HOT in place so that it has good contact with the heat-sink, getting the HOT into that tight space was difficult and frustrating to say the least but I succeeded eventually.
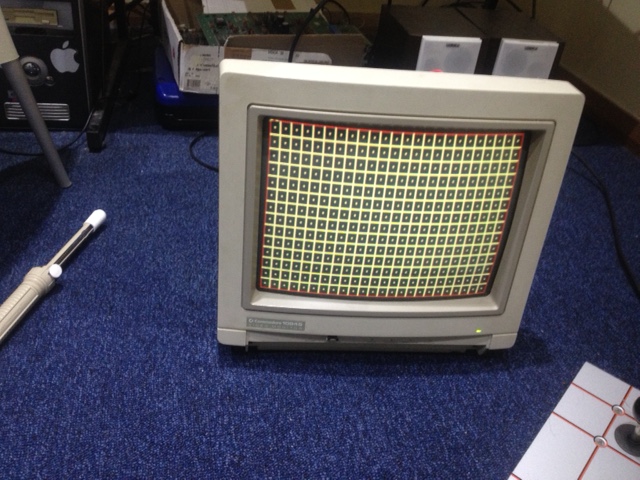
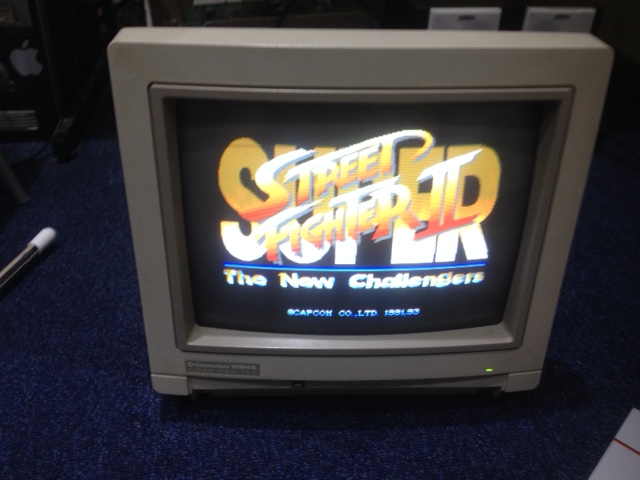
Moment of truth has arrived. I powered on the monitor with SSF2 running and was delighted to hear no high pitched whine sound however, the display was so bright that the CRT was blinking. I adjusted “screen” on the flyback until the blinking stopped and I could see faint text on the screen. I put the game into test mode and selected the dot hatch pattern and tweaked “focus” until I could get the display as sharp as possible. I then adjusted the “screen” to get the brightness where I wanted it & then finished off by tweaking “focus” once again.
Happy with the results. The strange lines I described earlier are now gone and the display has never looked better. I re-assembled the monitor and I plan to play a few more rounds of SSF2 tonight.
Thanks to caius for helping me with this repair.